Homemade teleprompter with DeskLab screen
Background
A friend wanted a high-quality teleprompter and wanted to use a DeskLab screen for it, a product normally intended as a portable second monitor for a laptop, as he already had one. He offered me a deal whereby he would pay for all the components and materials and I would invest the labour to build two identical teleprompters, one for him and one for myself.
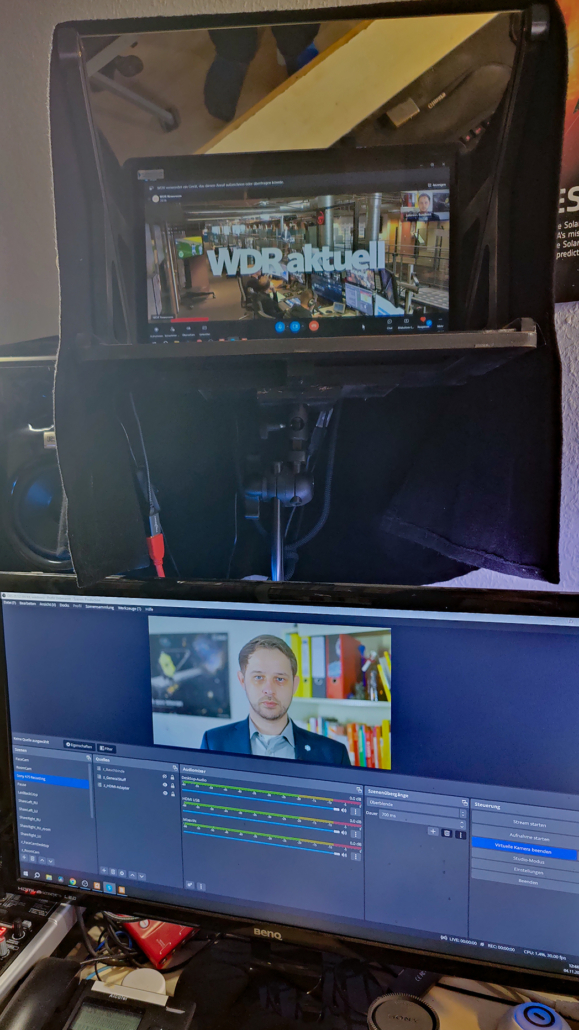
A teleprompter works by displaying text or video on a monitor, which is reflected via a partially mirrored glass. The camera records through the glass. This allows the speaker to look into the camera and simultaneously see the screen, which, due to the reflection, appears as if it were directly in front of the camera. The eyes of the person in front of the camera appear as if they are looking directly into the camera.
Prototype
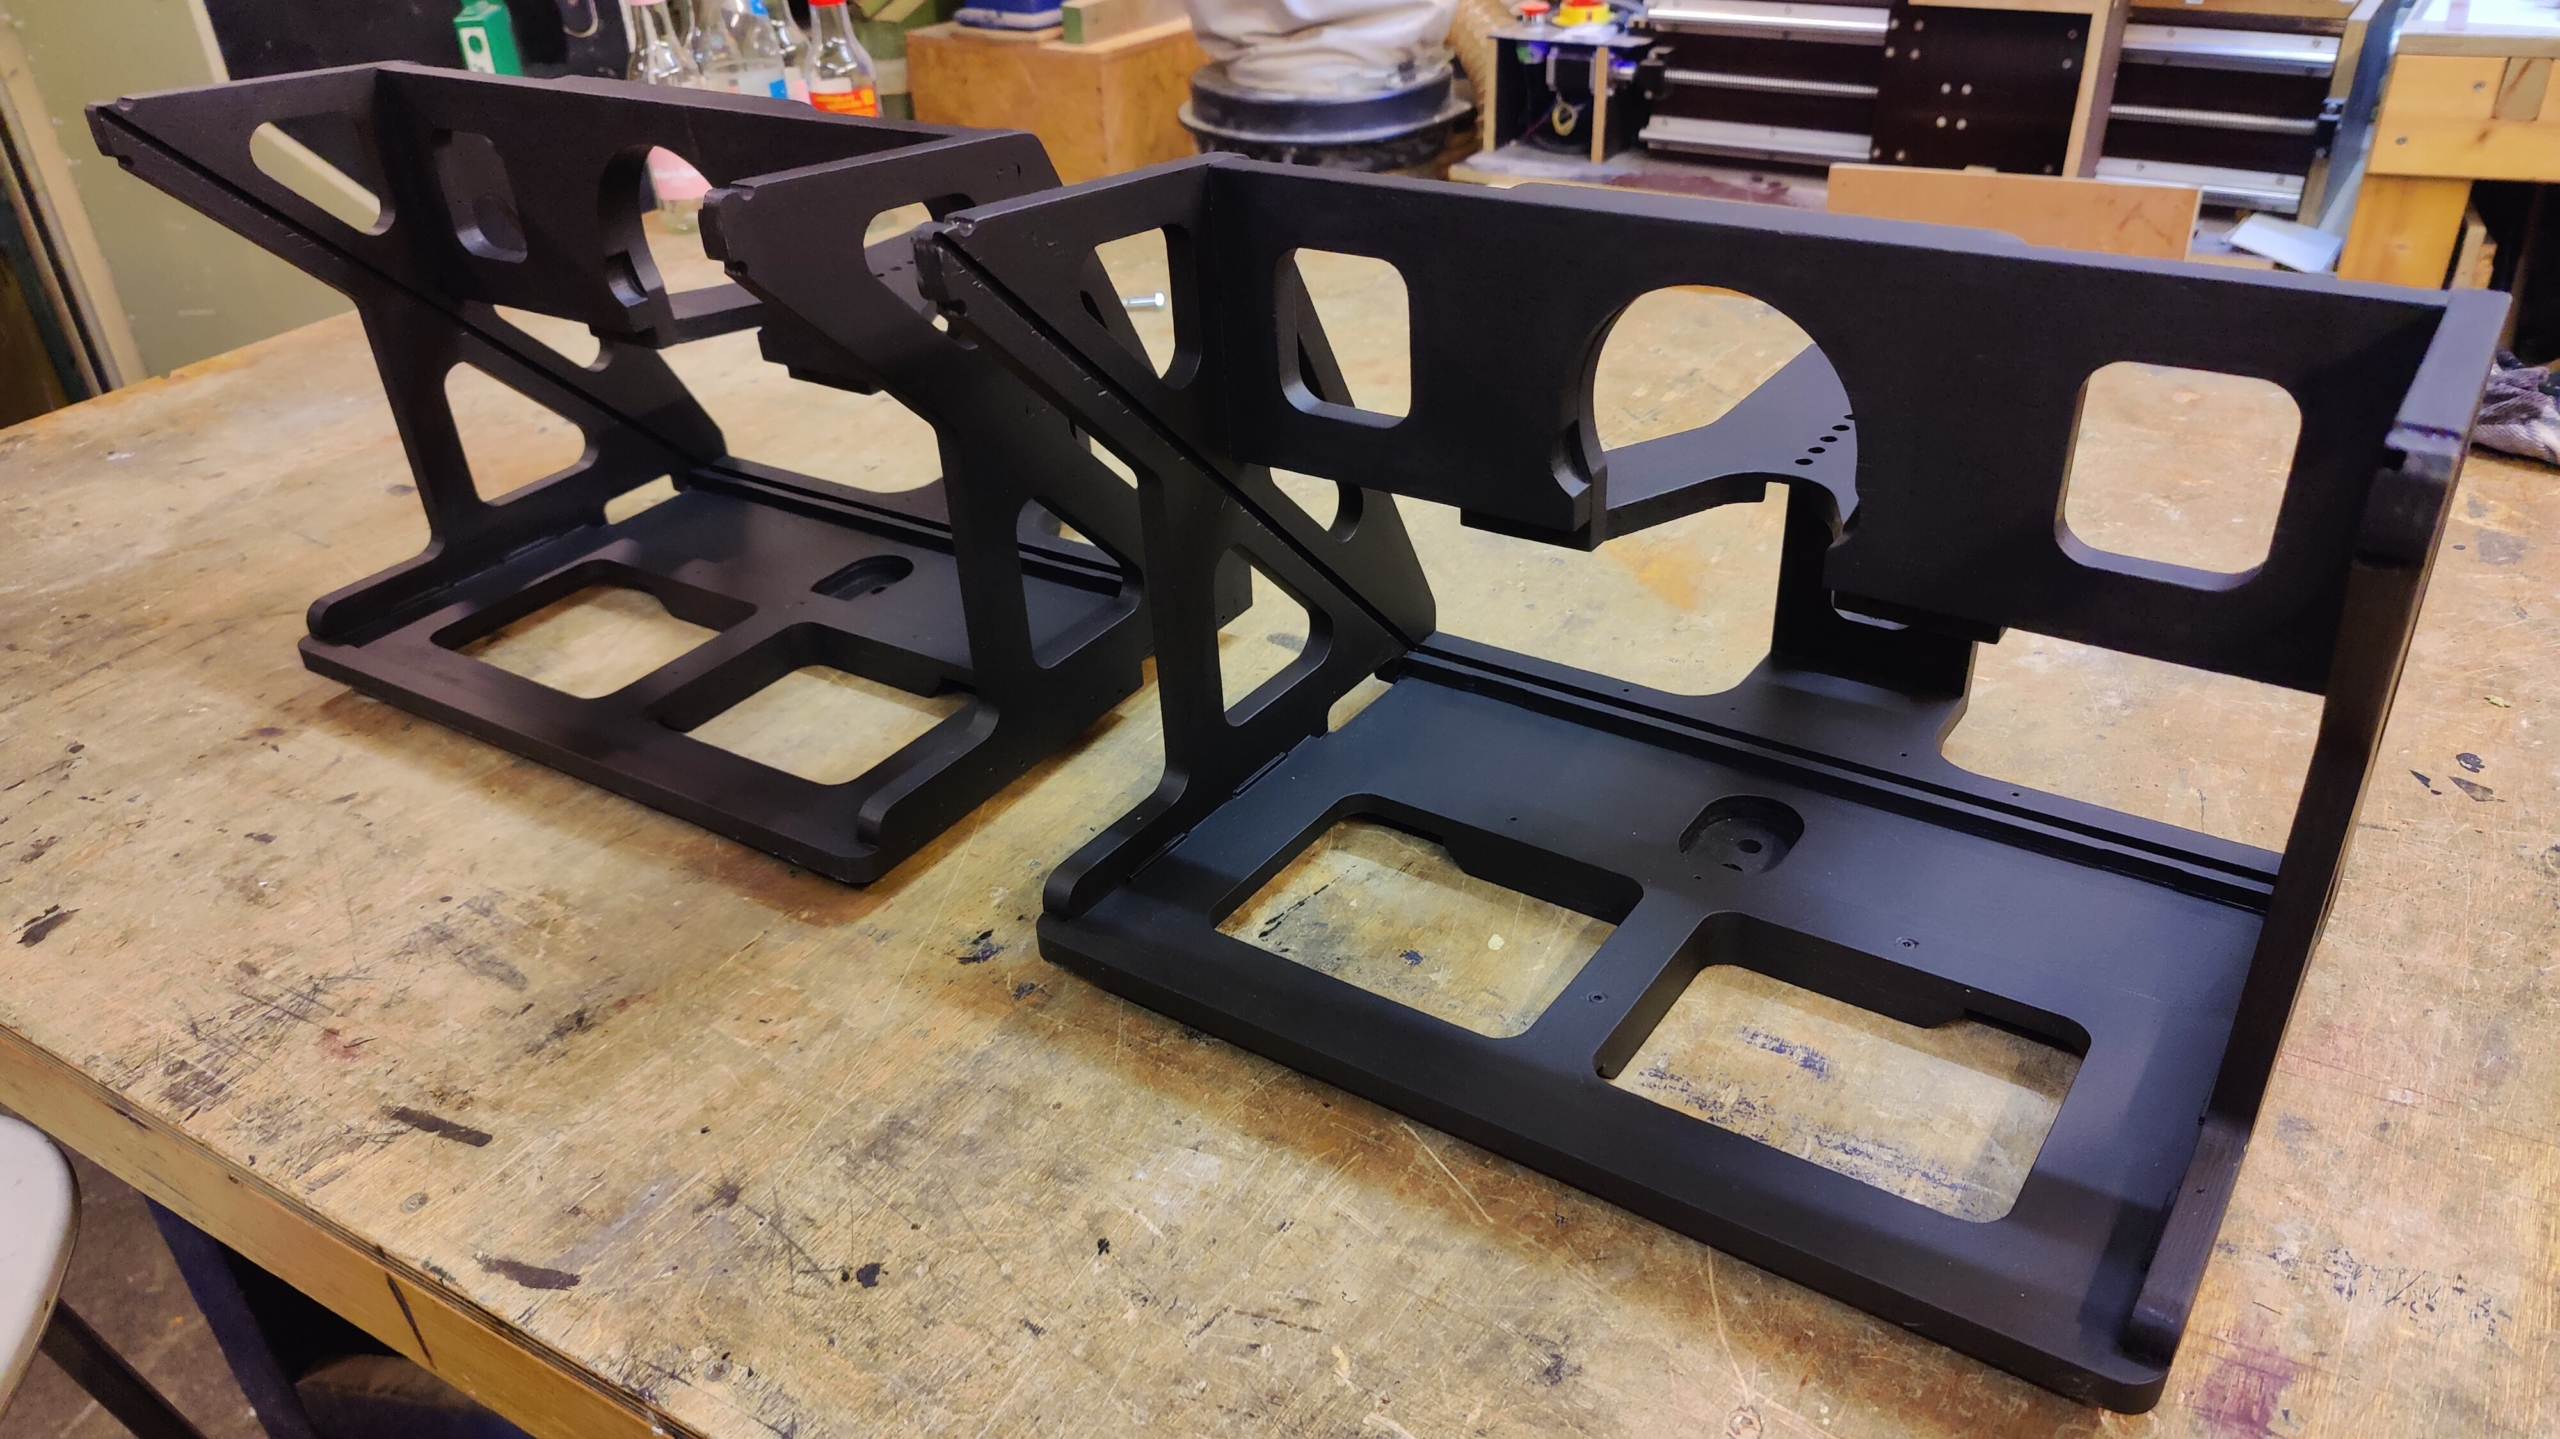
To make sure everything worked, I first made the design out of cheaper MDF to verify that everything fits. In doing so, I was able to find a few minor errors in the design. Because MDF is relatively soft, I was able to modify the assembled frame a little until everything fit. I then adjusted the CAD model and corrected the design errors there as well.
I painted the prototype with black ‘silk matt’ paint. Unfortunately, this paint was too shiny, so I had to sand most of it off.
There was a long period between the construction of the prototype and the manufacture of the final product.
Realisation
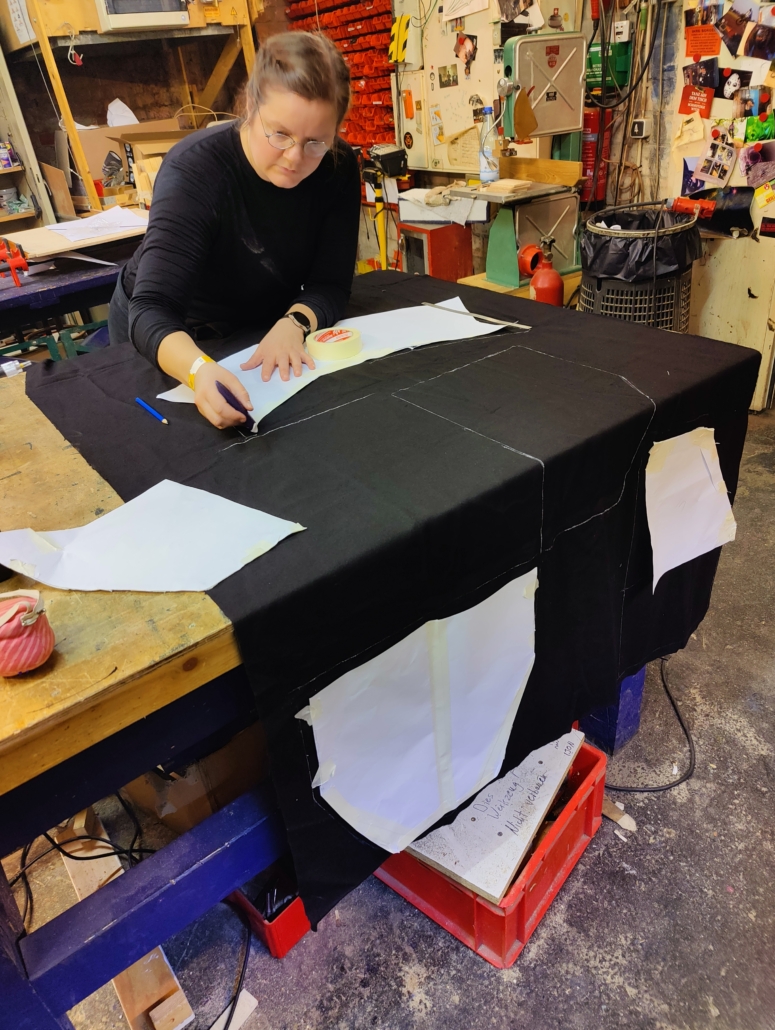
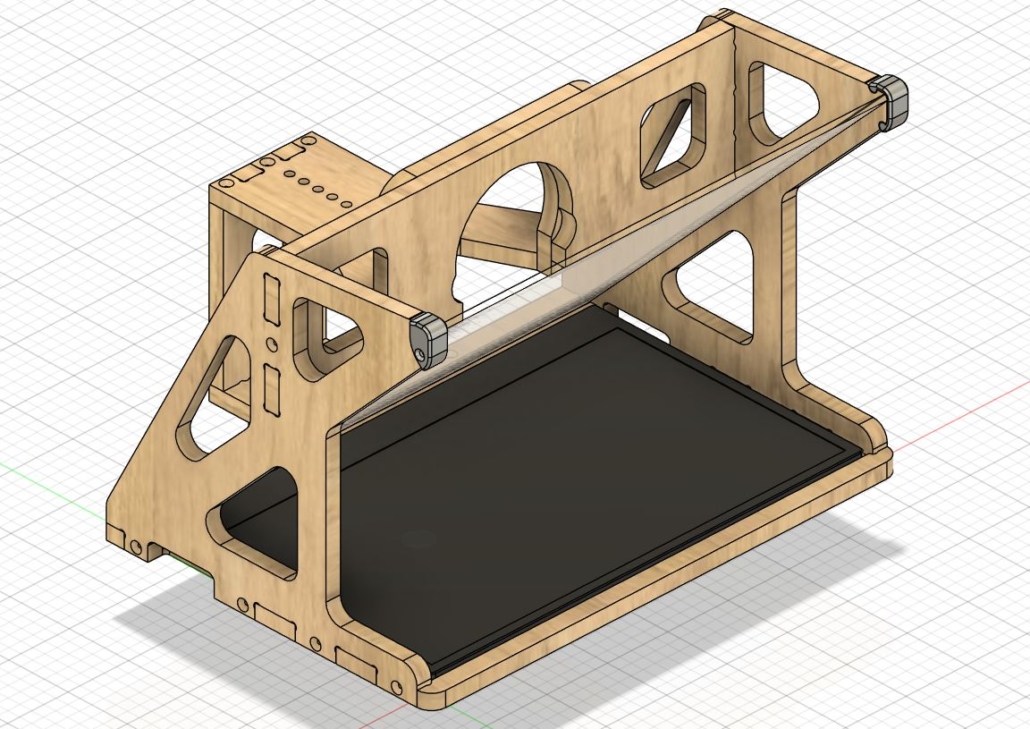
The teleprompter was made from CNC-milled multiplex boards with a thickness of 12 mm. The wooden frame is assembled using finger joints, with screws serving only as a safety measure to prevent the parts from sliding apart. The wooden frame positions all other components: screen, camera, molton and glass. For the glass, I used the product ‘Mirona Beamsplitter’ from Schott. The cover was made by my friend Suski, who developed a pattern and sewed two covers from black molton. The cover is attached to the frame with Velcro tape. On the underside of the frame, I integrated a socket for standard TV plugs to enable the teleprompter to be attached using standard materials.
The mistake I made when painting the prototype was too long ago to have a lasting learning effect. So I repainted both teleprompters with black acrylic paint of the ‘silk matt’ variety and was annoyed by the strong sheen. After sanding again, it took two coats of ‘ultra matt’ paint to achieve the desired finish.
Obstacles
One problem emerged very late in the project. Initially, we assumed that the image could be mirrored in the computer’s operating system. Unfortunately, however, this was not reliably possible in every scenario. The solution was simple but costly and consisted of an Decimator MD-HX that mirrors the signal.
Result
In the end, I made two units, one for my friend and one for myself. The sturdy wooden frame, Mirona glass, Molton cover and ultra-matt surface all contribute to a robust and functional device.
The CAD data for the project in Fusion 360, a parts list and .step files for each CNC-milled component are available for download here. There is no detailed tutorial and the pattern for the Molton cover does not exist in digital form. The pattern only existed for a very short time and consisted of pieces of paper glued together. I would therefore only recommend replicating it to people who are skilled with their hands.
If you do replicate the teleprompter, I would be delighted to hear from you.
I have already used my teleprompter several times for media appearances, such as live TV broadcasts.