Hose adapter for dust extraction
Problem
Our dust collector came with a flexible rubber hose. which we had to pull laboriously on the dust port of the table saw for the first few months, this caused damage in the long run to the hose and was more and more difficult the further the edge was torn. For the tilting router lift we fixed the dust extraction temporarily with adhesive tape, when we needed it. A better solution was needed.
The fence for the self-made tilting router lift has cutouts which are intended for the connection to the dust extraction system. The original plans by Matthias Wandel stated that here a wooden box could be constructed in which a corresponding dust extraction port could be inserted, but I did not like this solution.
Solution
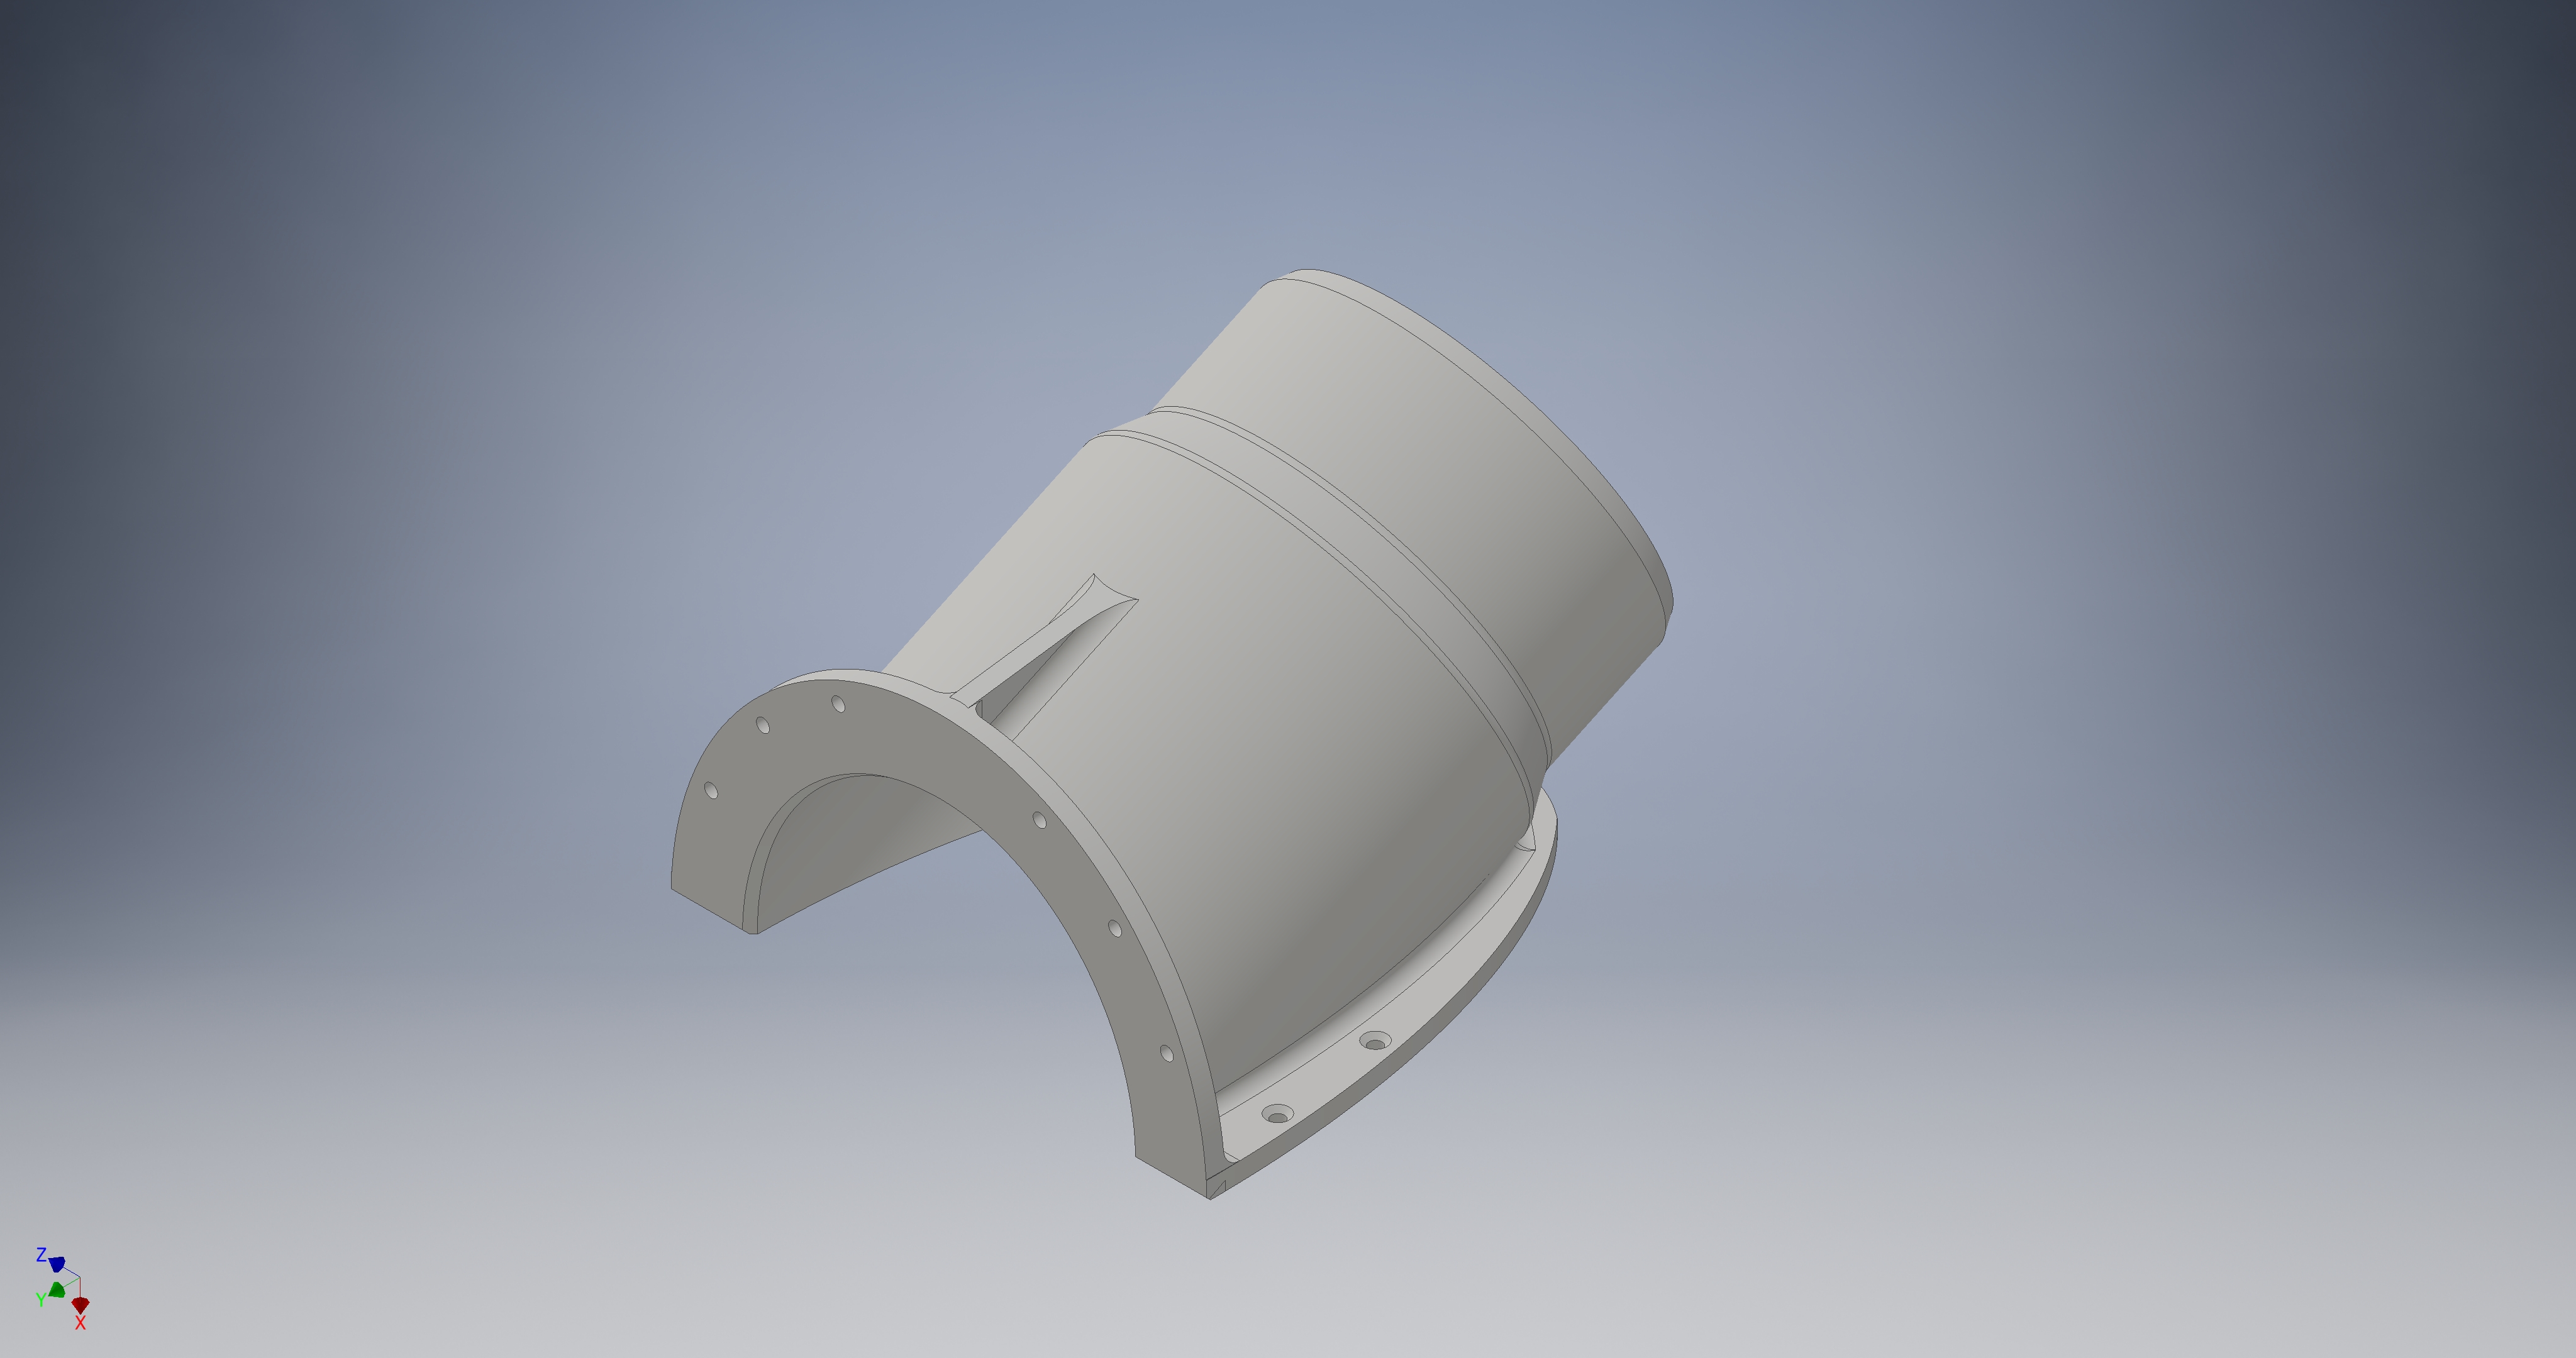
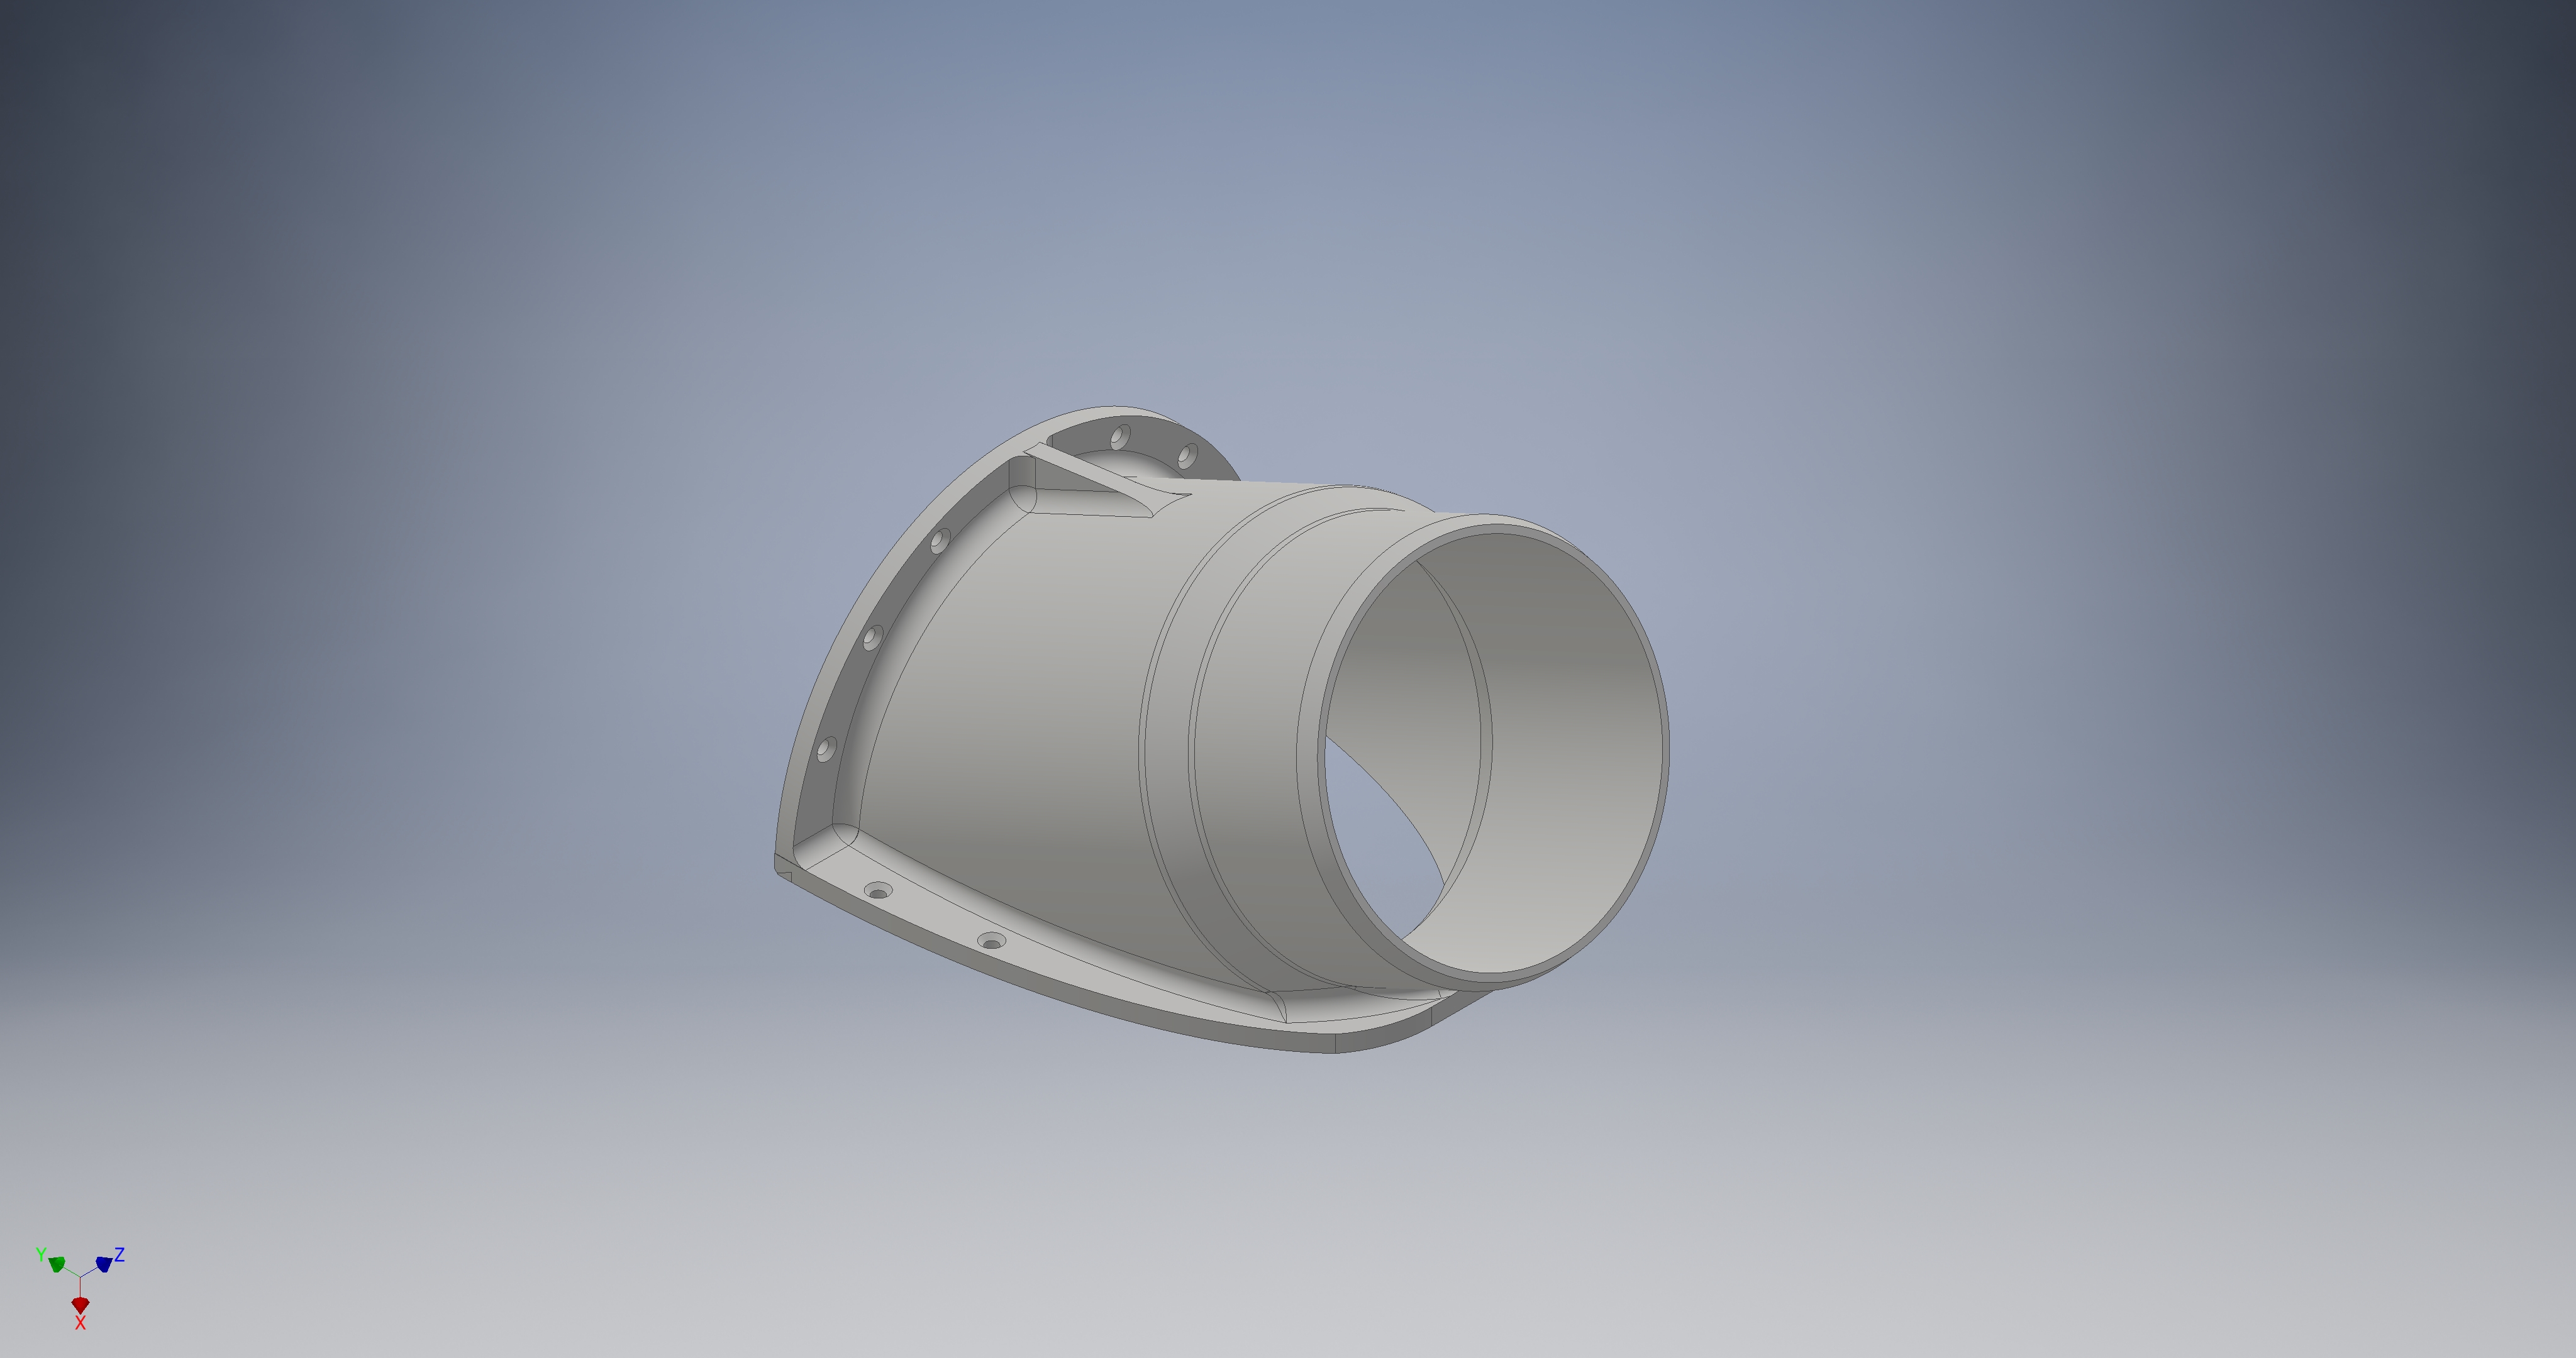 With the software package Autodesk Inventor I designed a connector for the fence. This piece has a flange which can be fastened to the fence with short Screws.
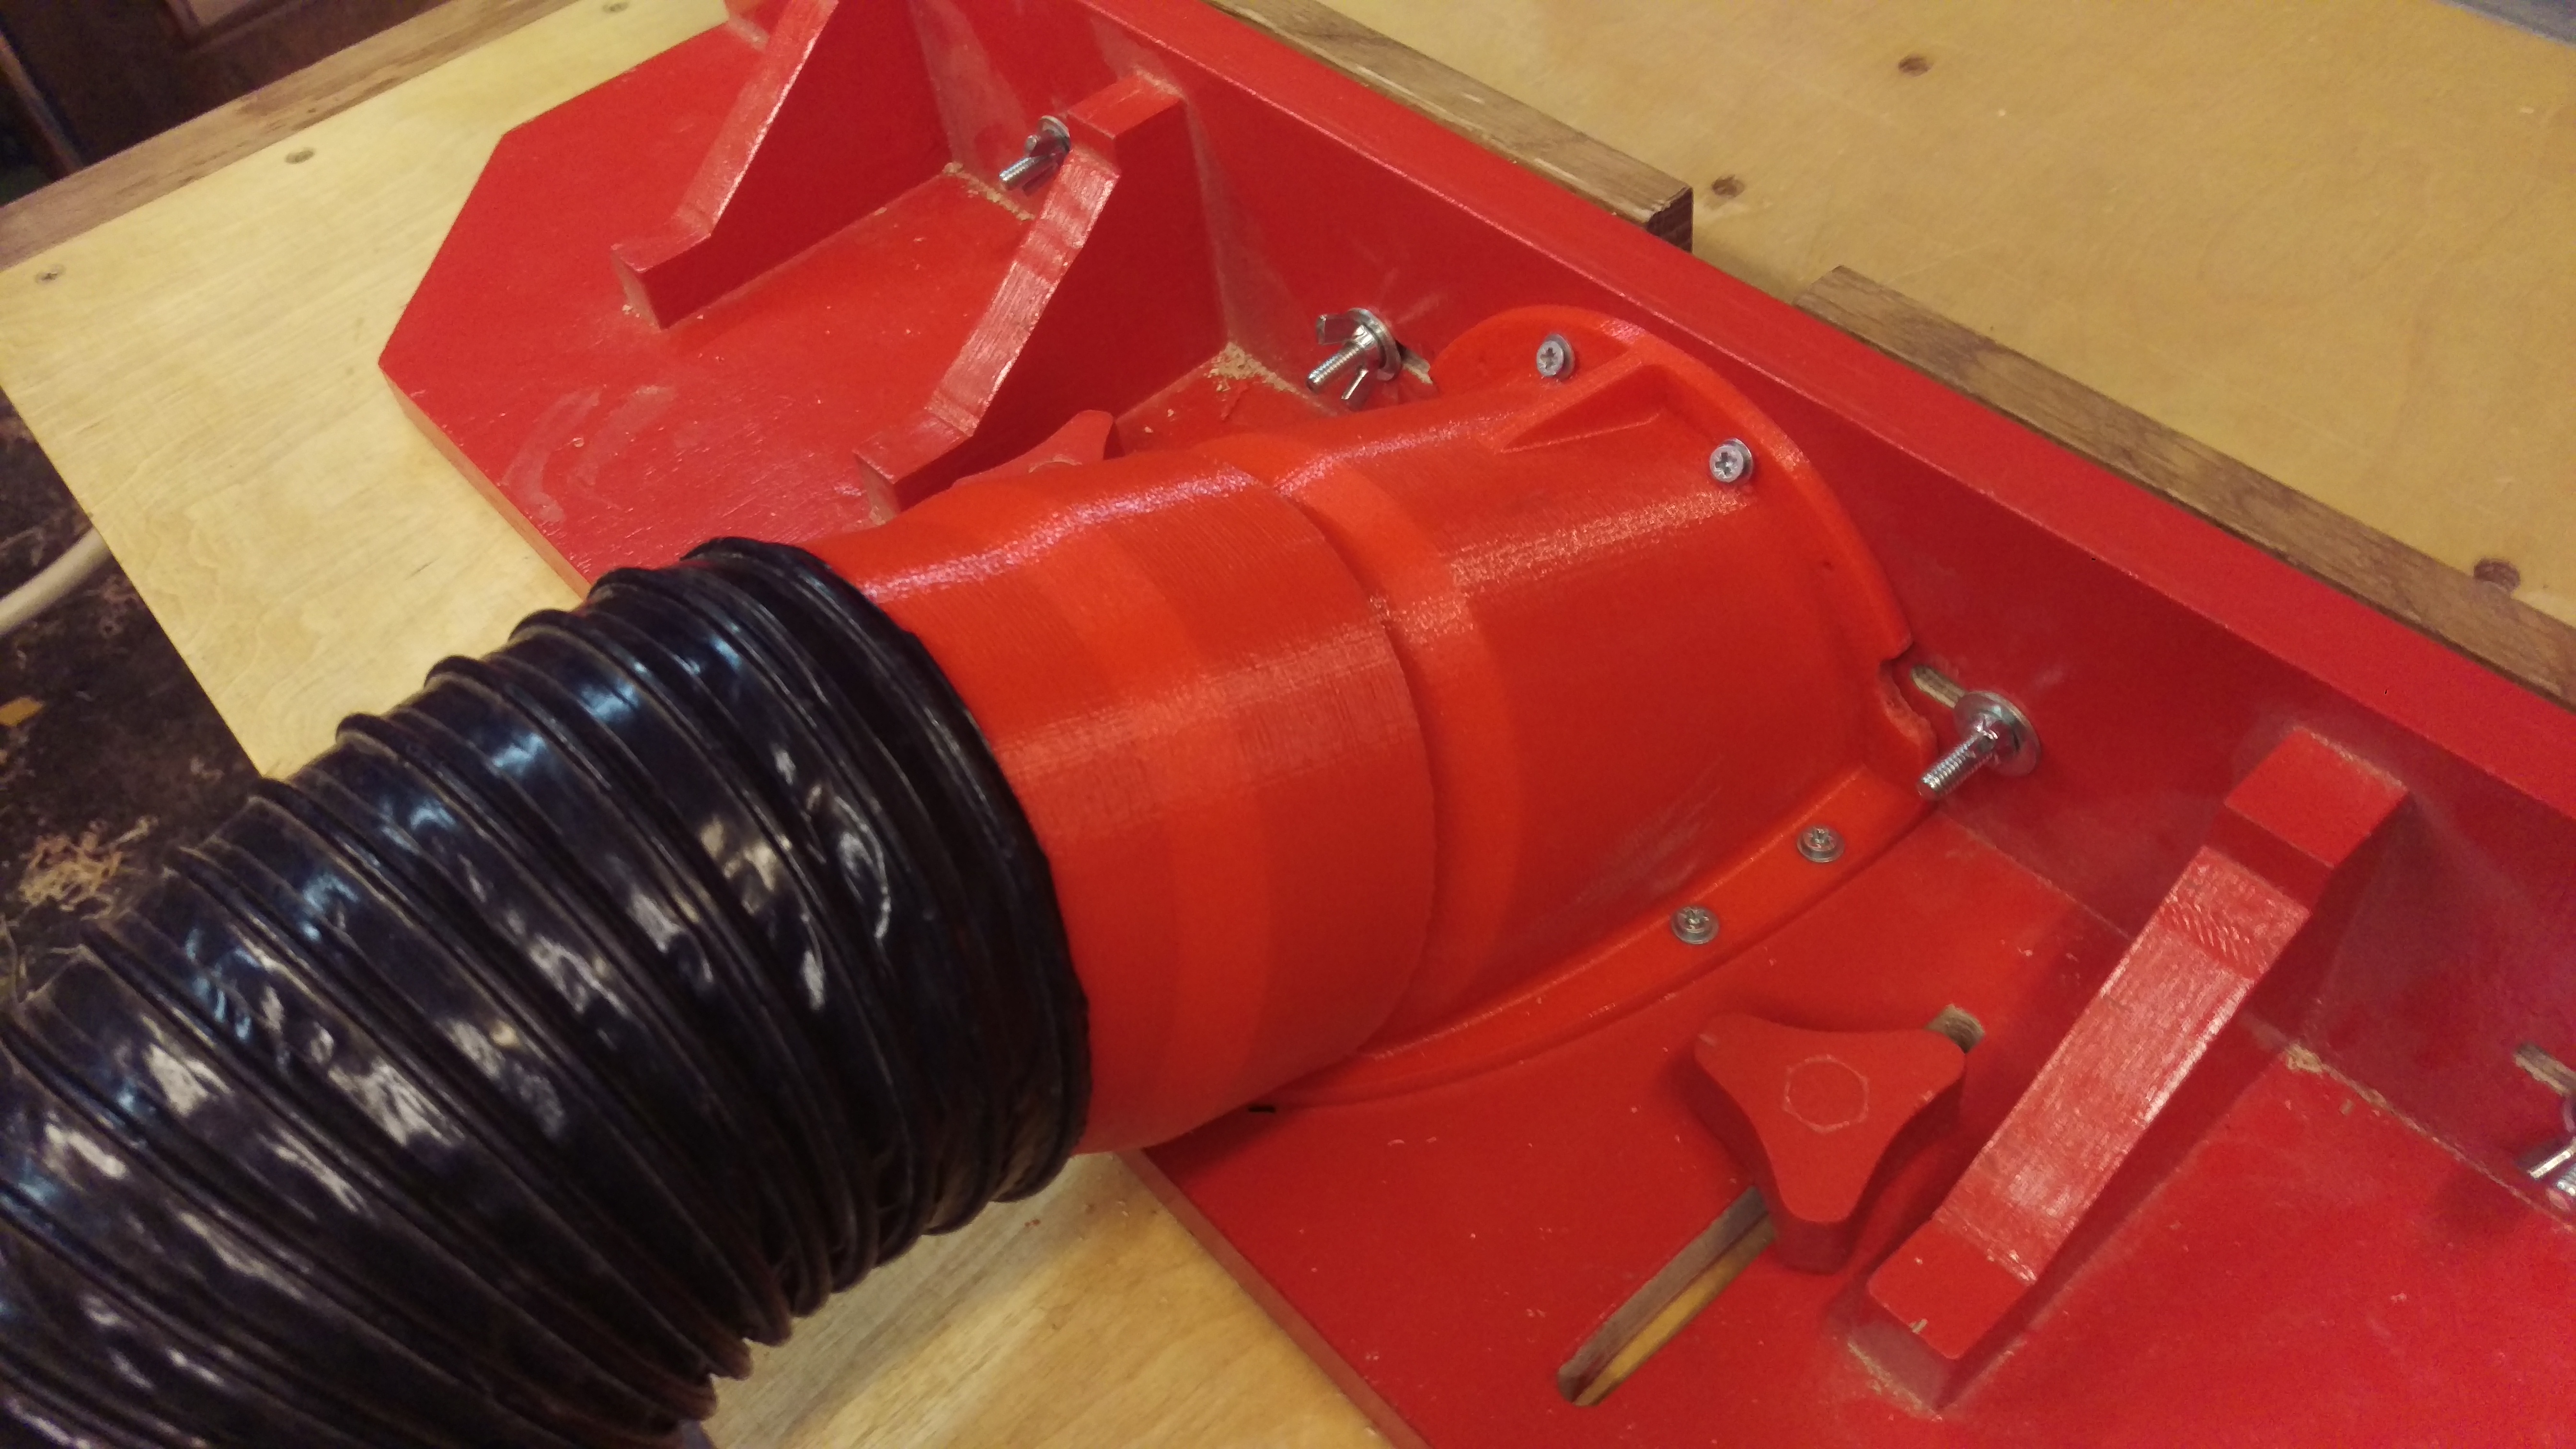
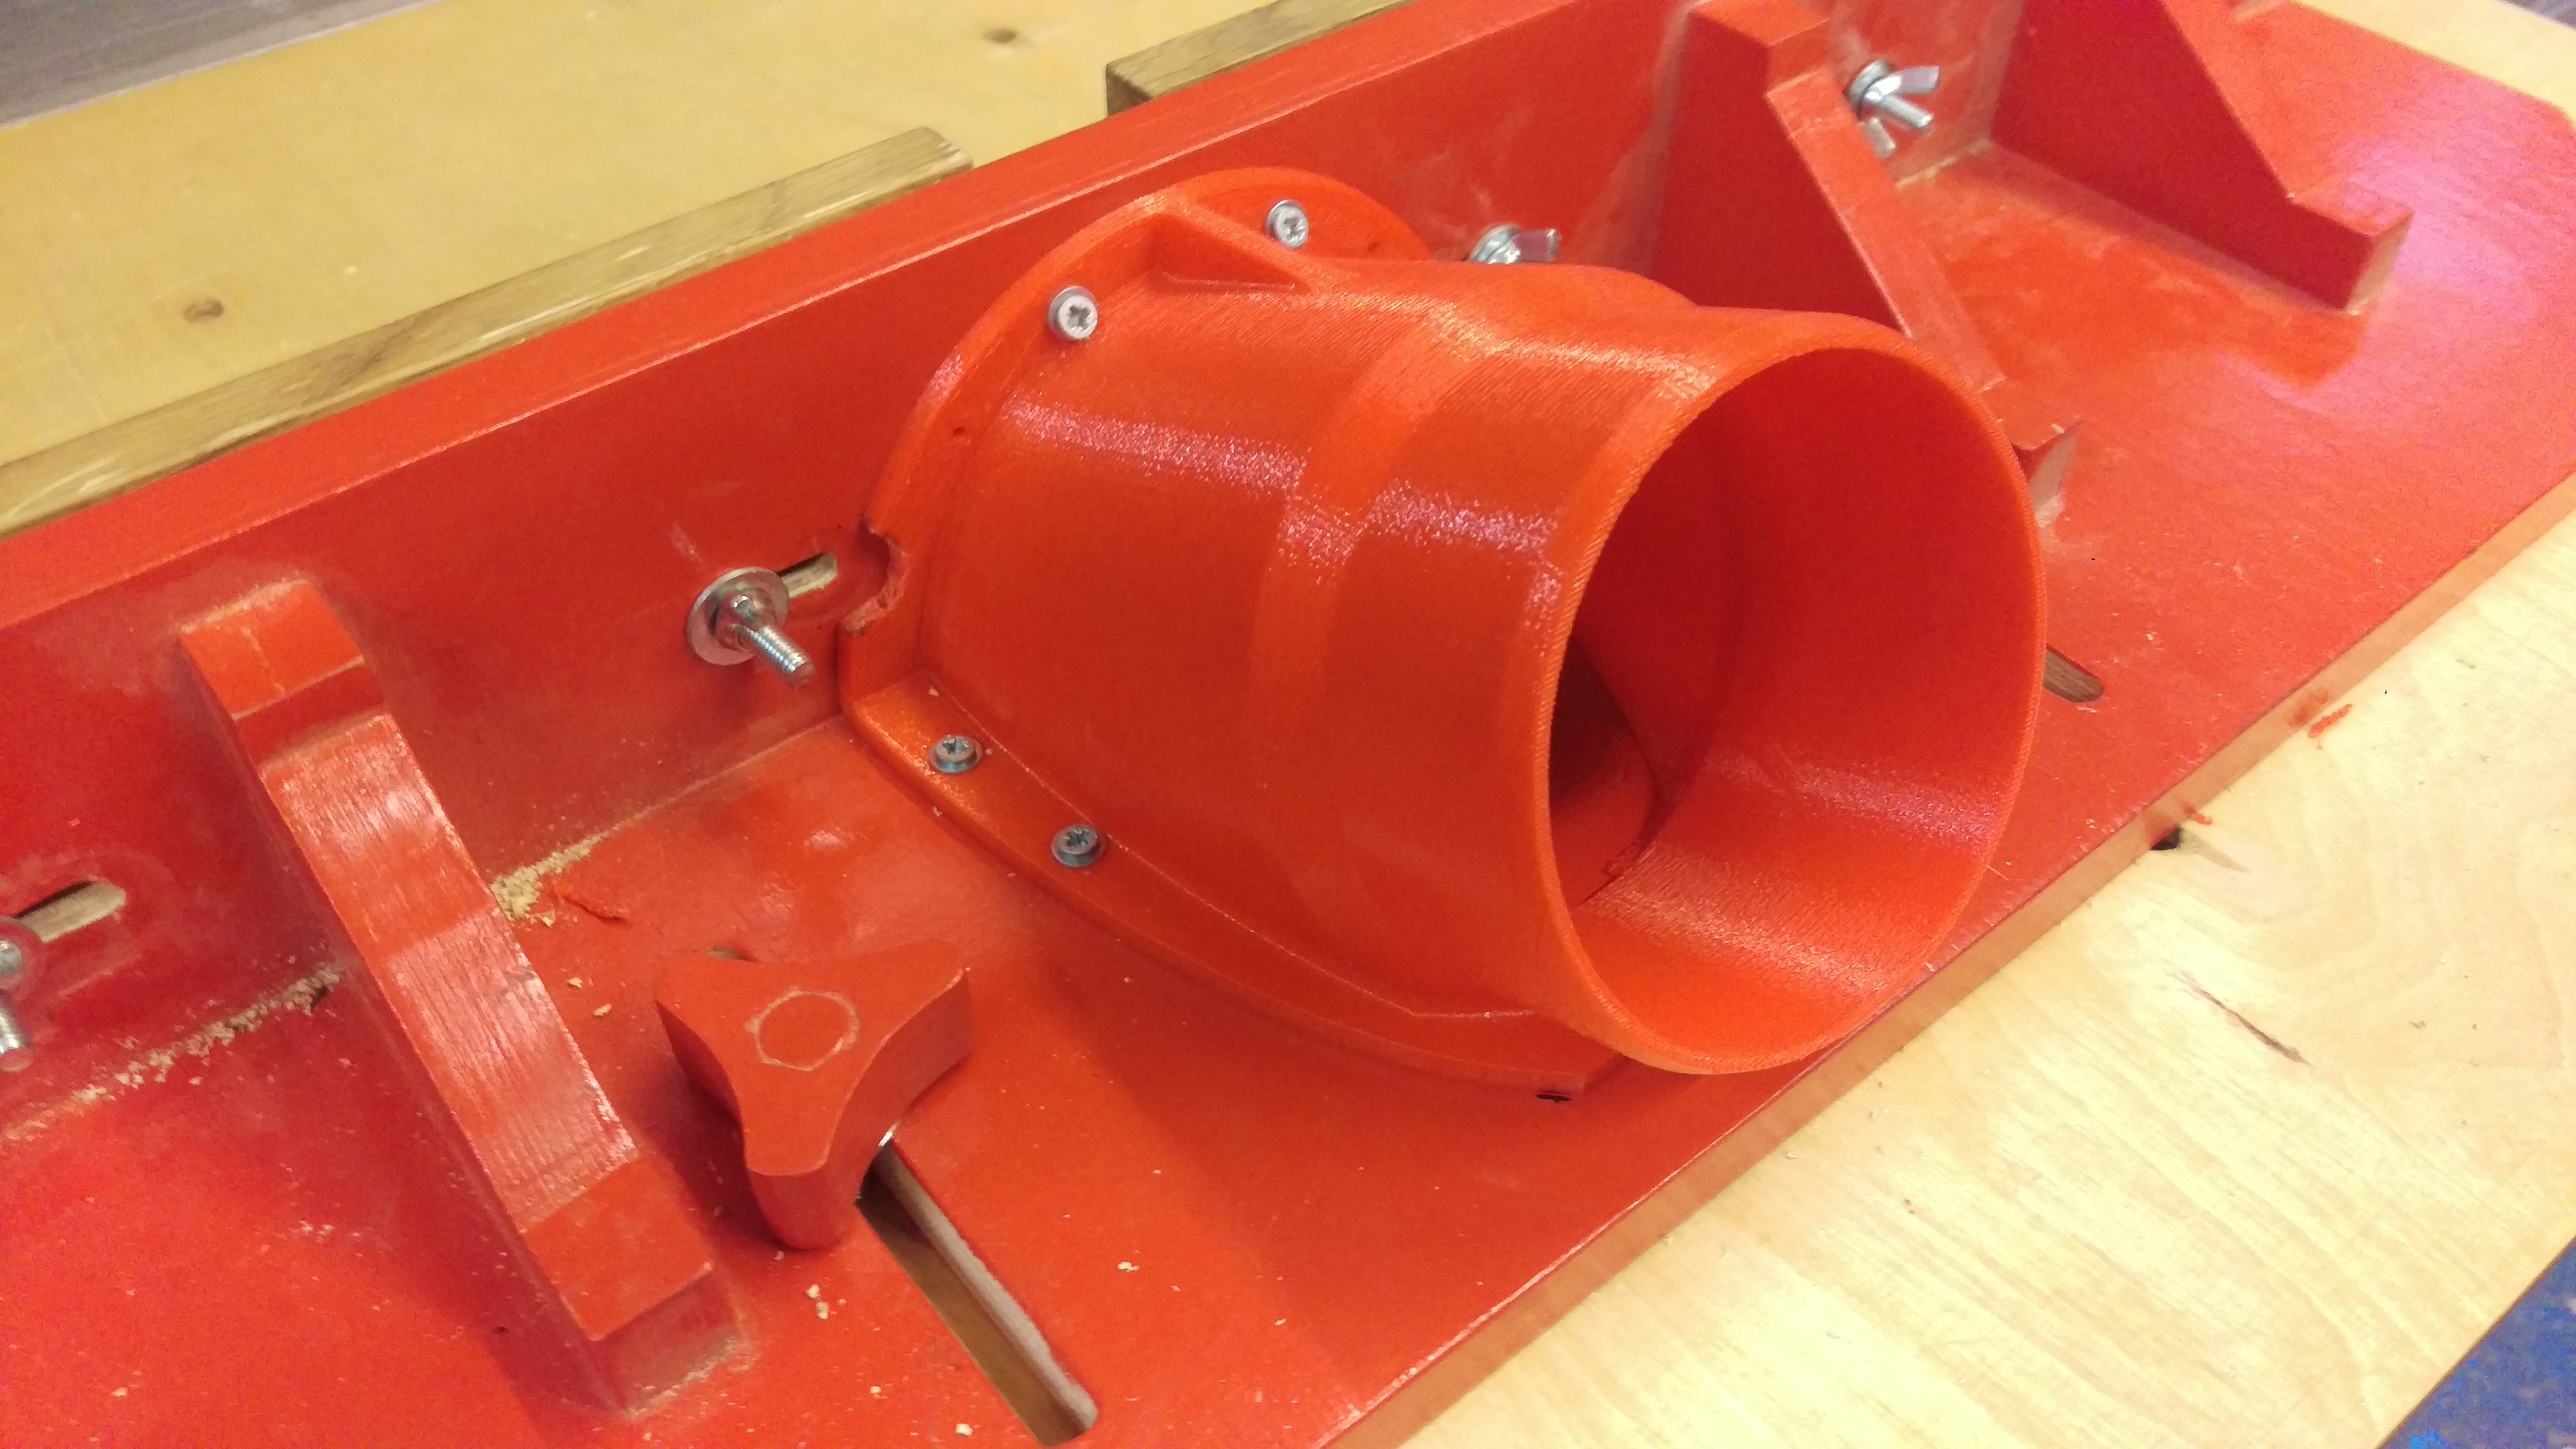
 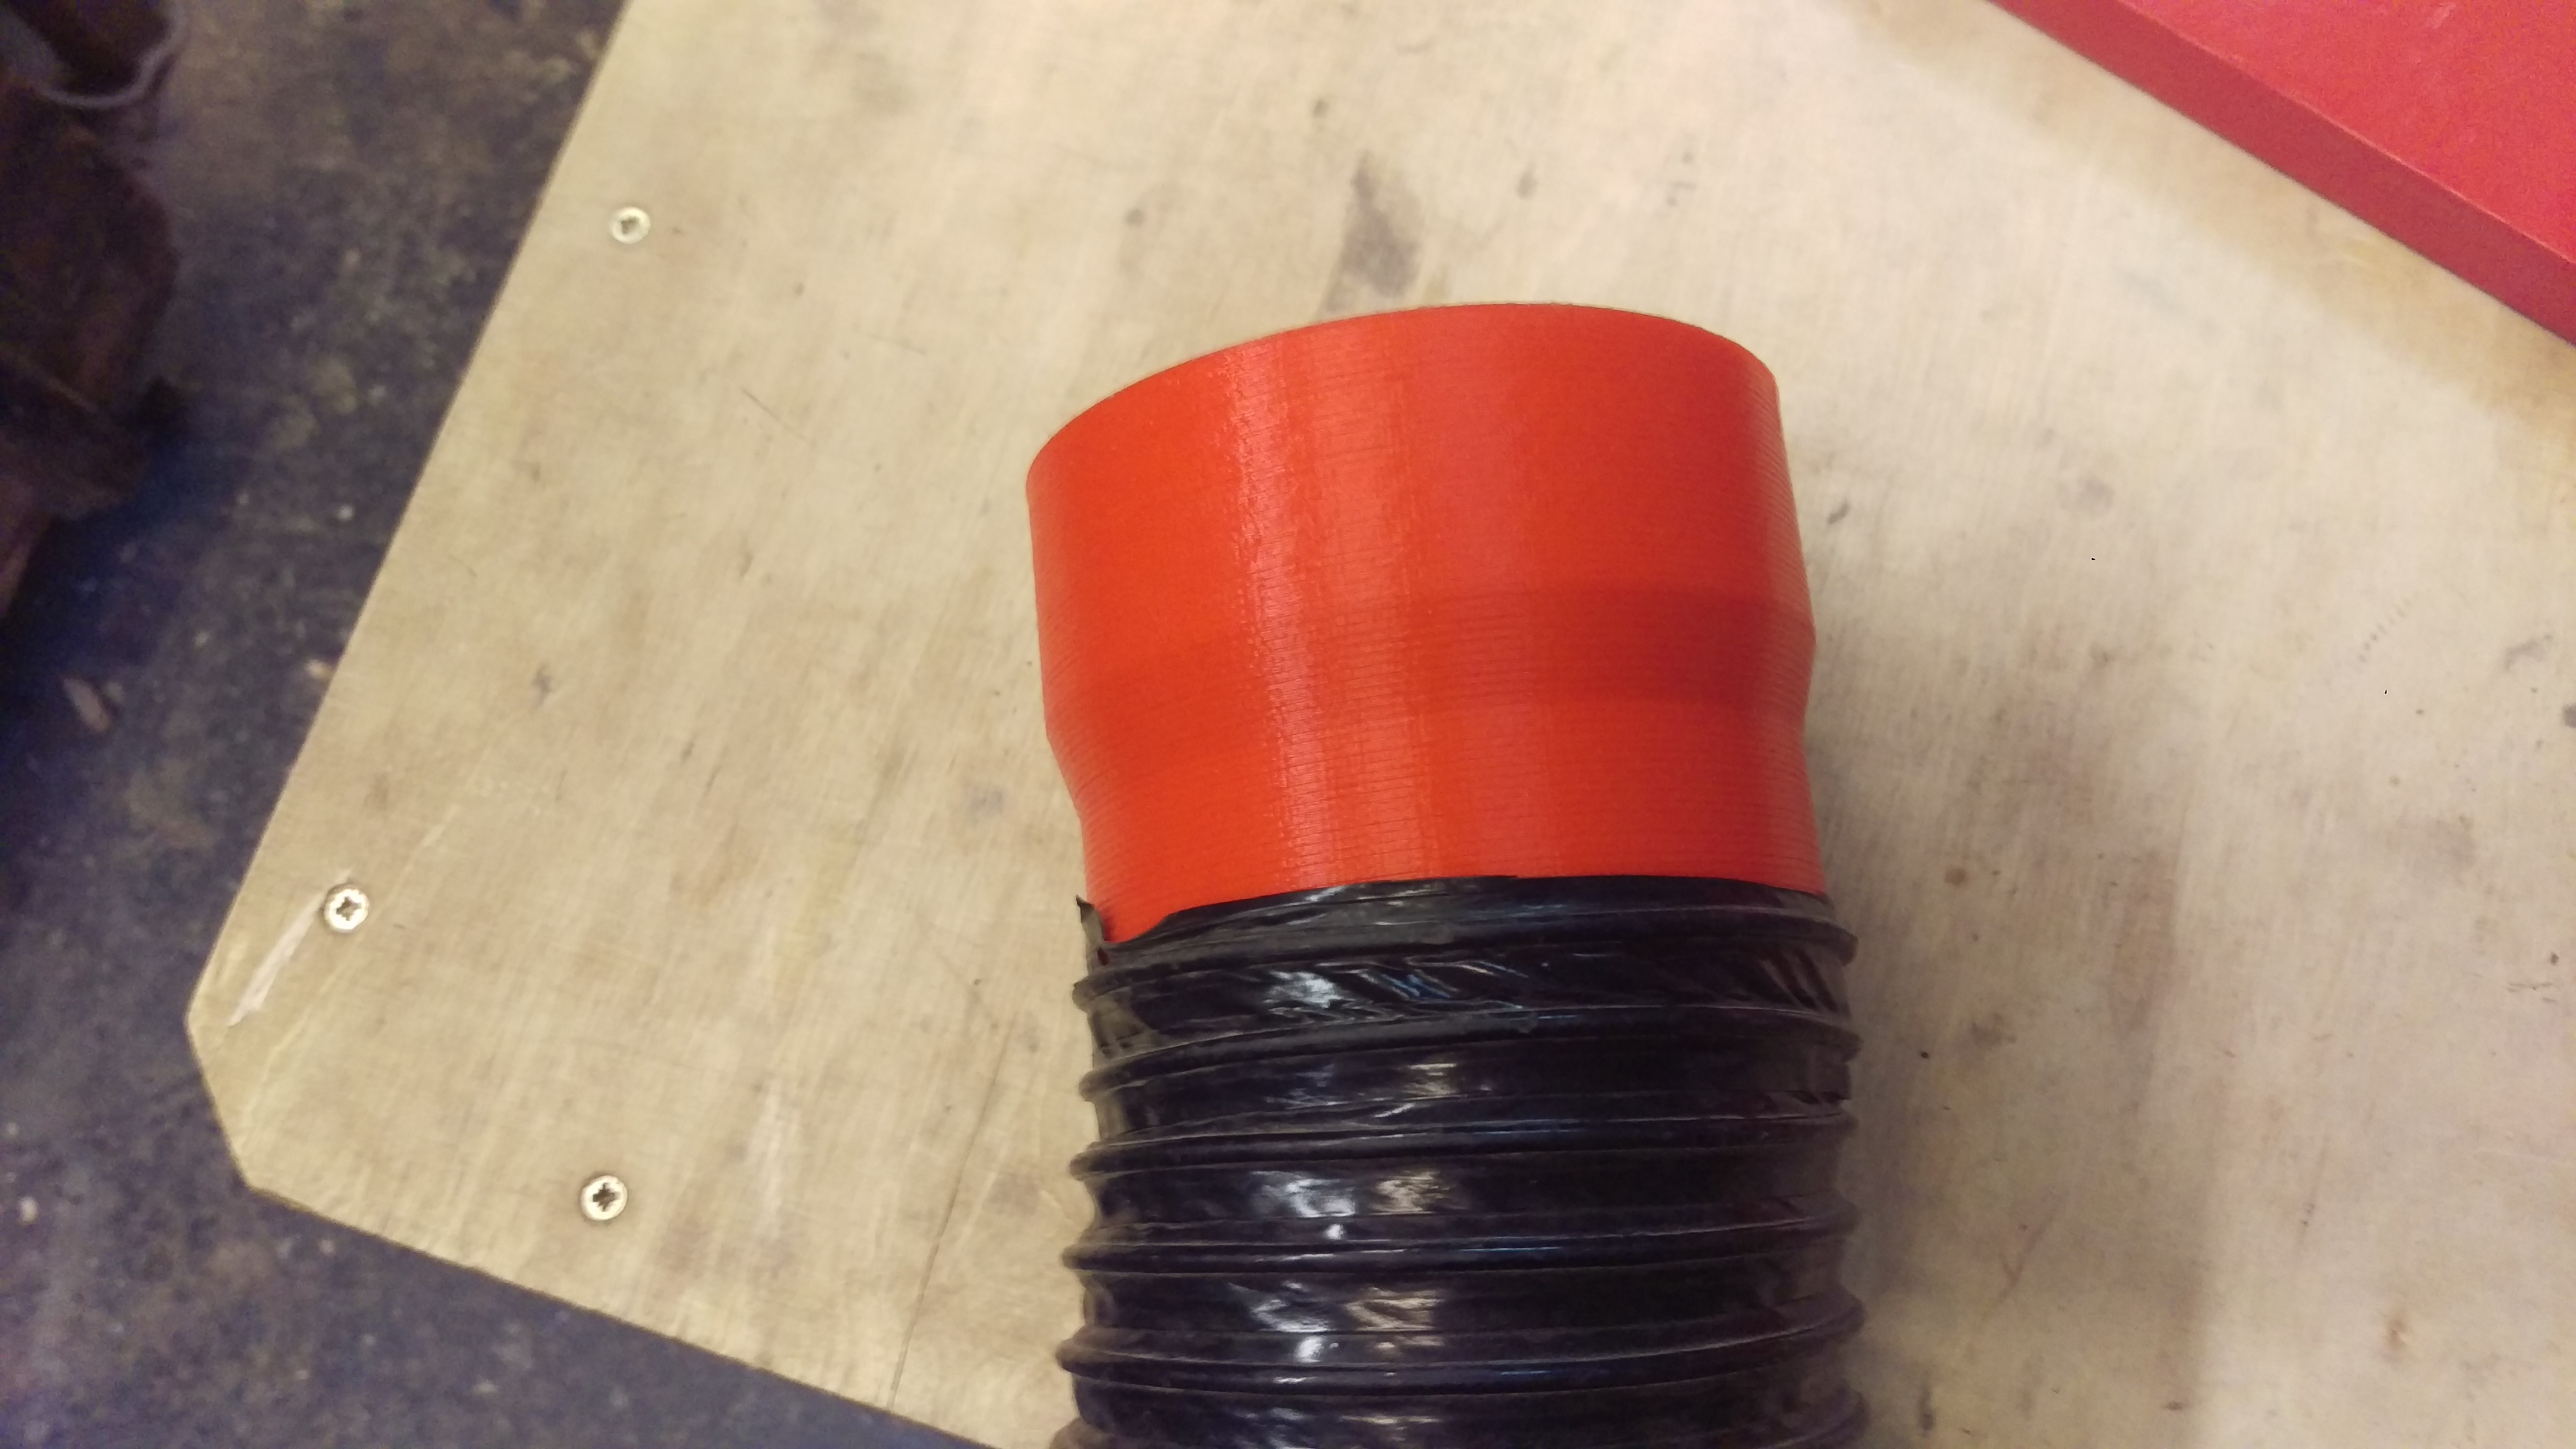 The counterpart is constructed so that the flexible rubber hose just so fits on one end and the other end fits on the dust port of the fence.
3D-Printing
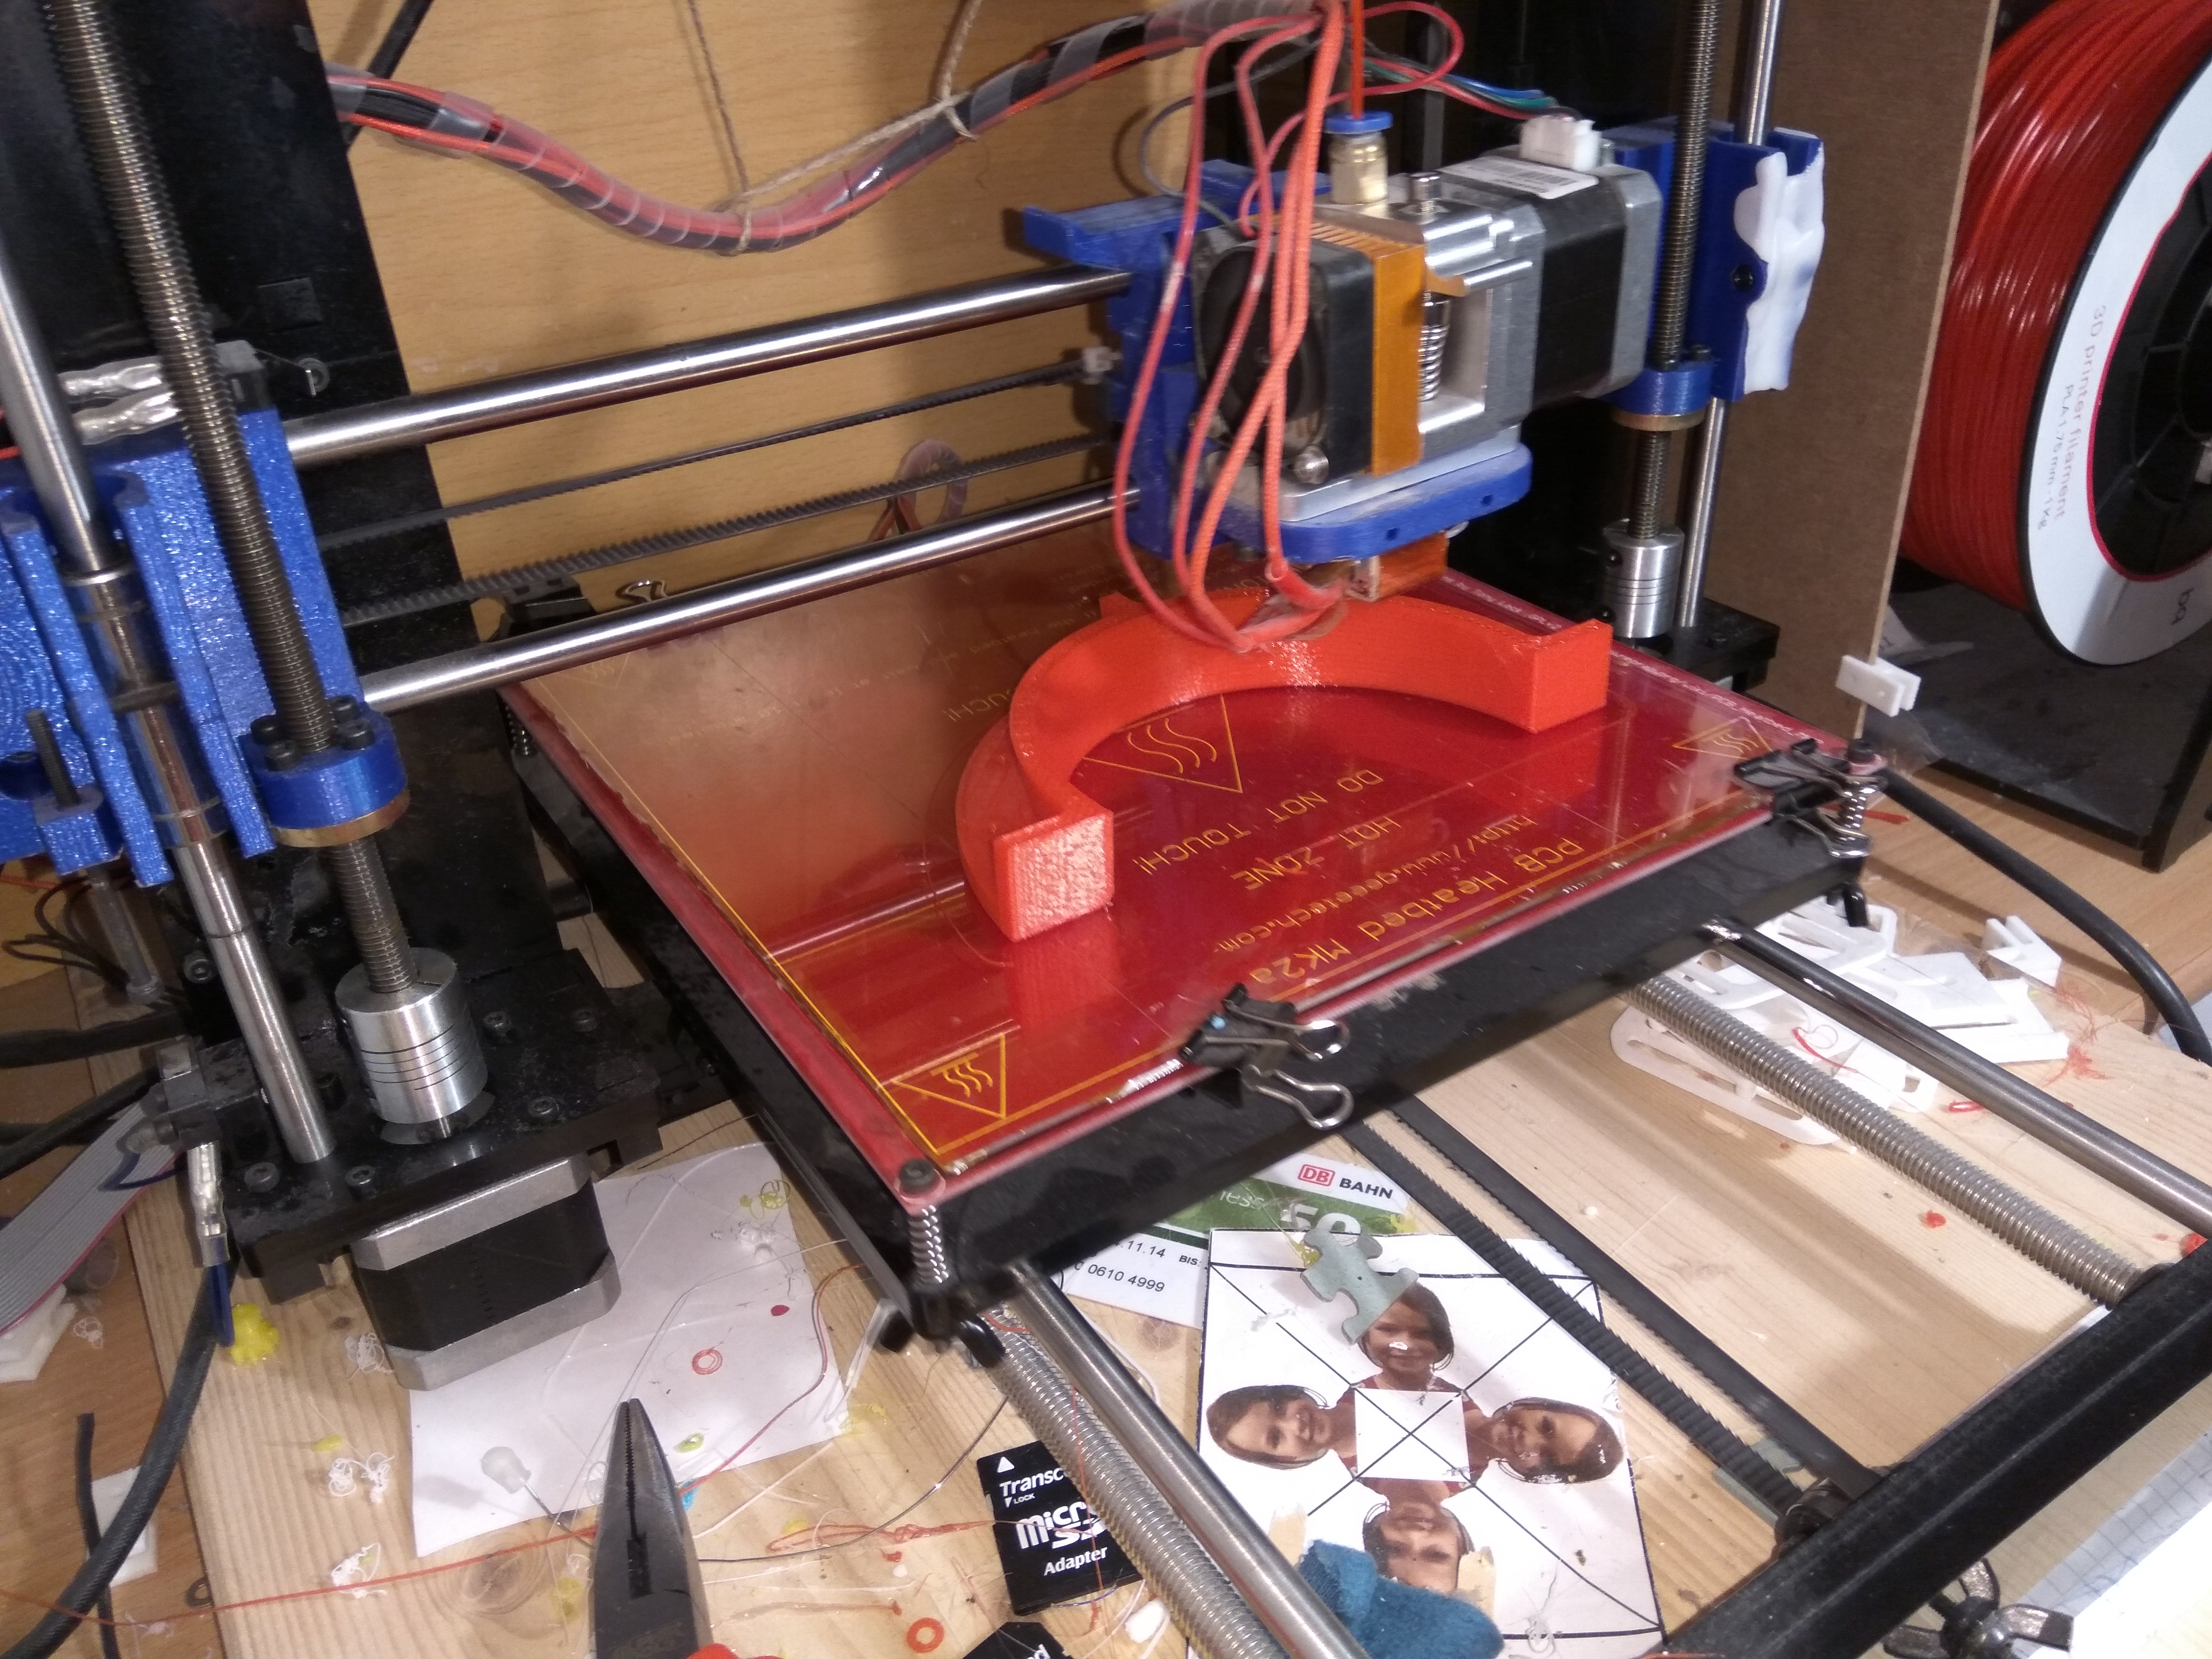
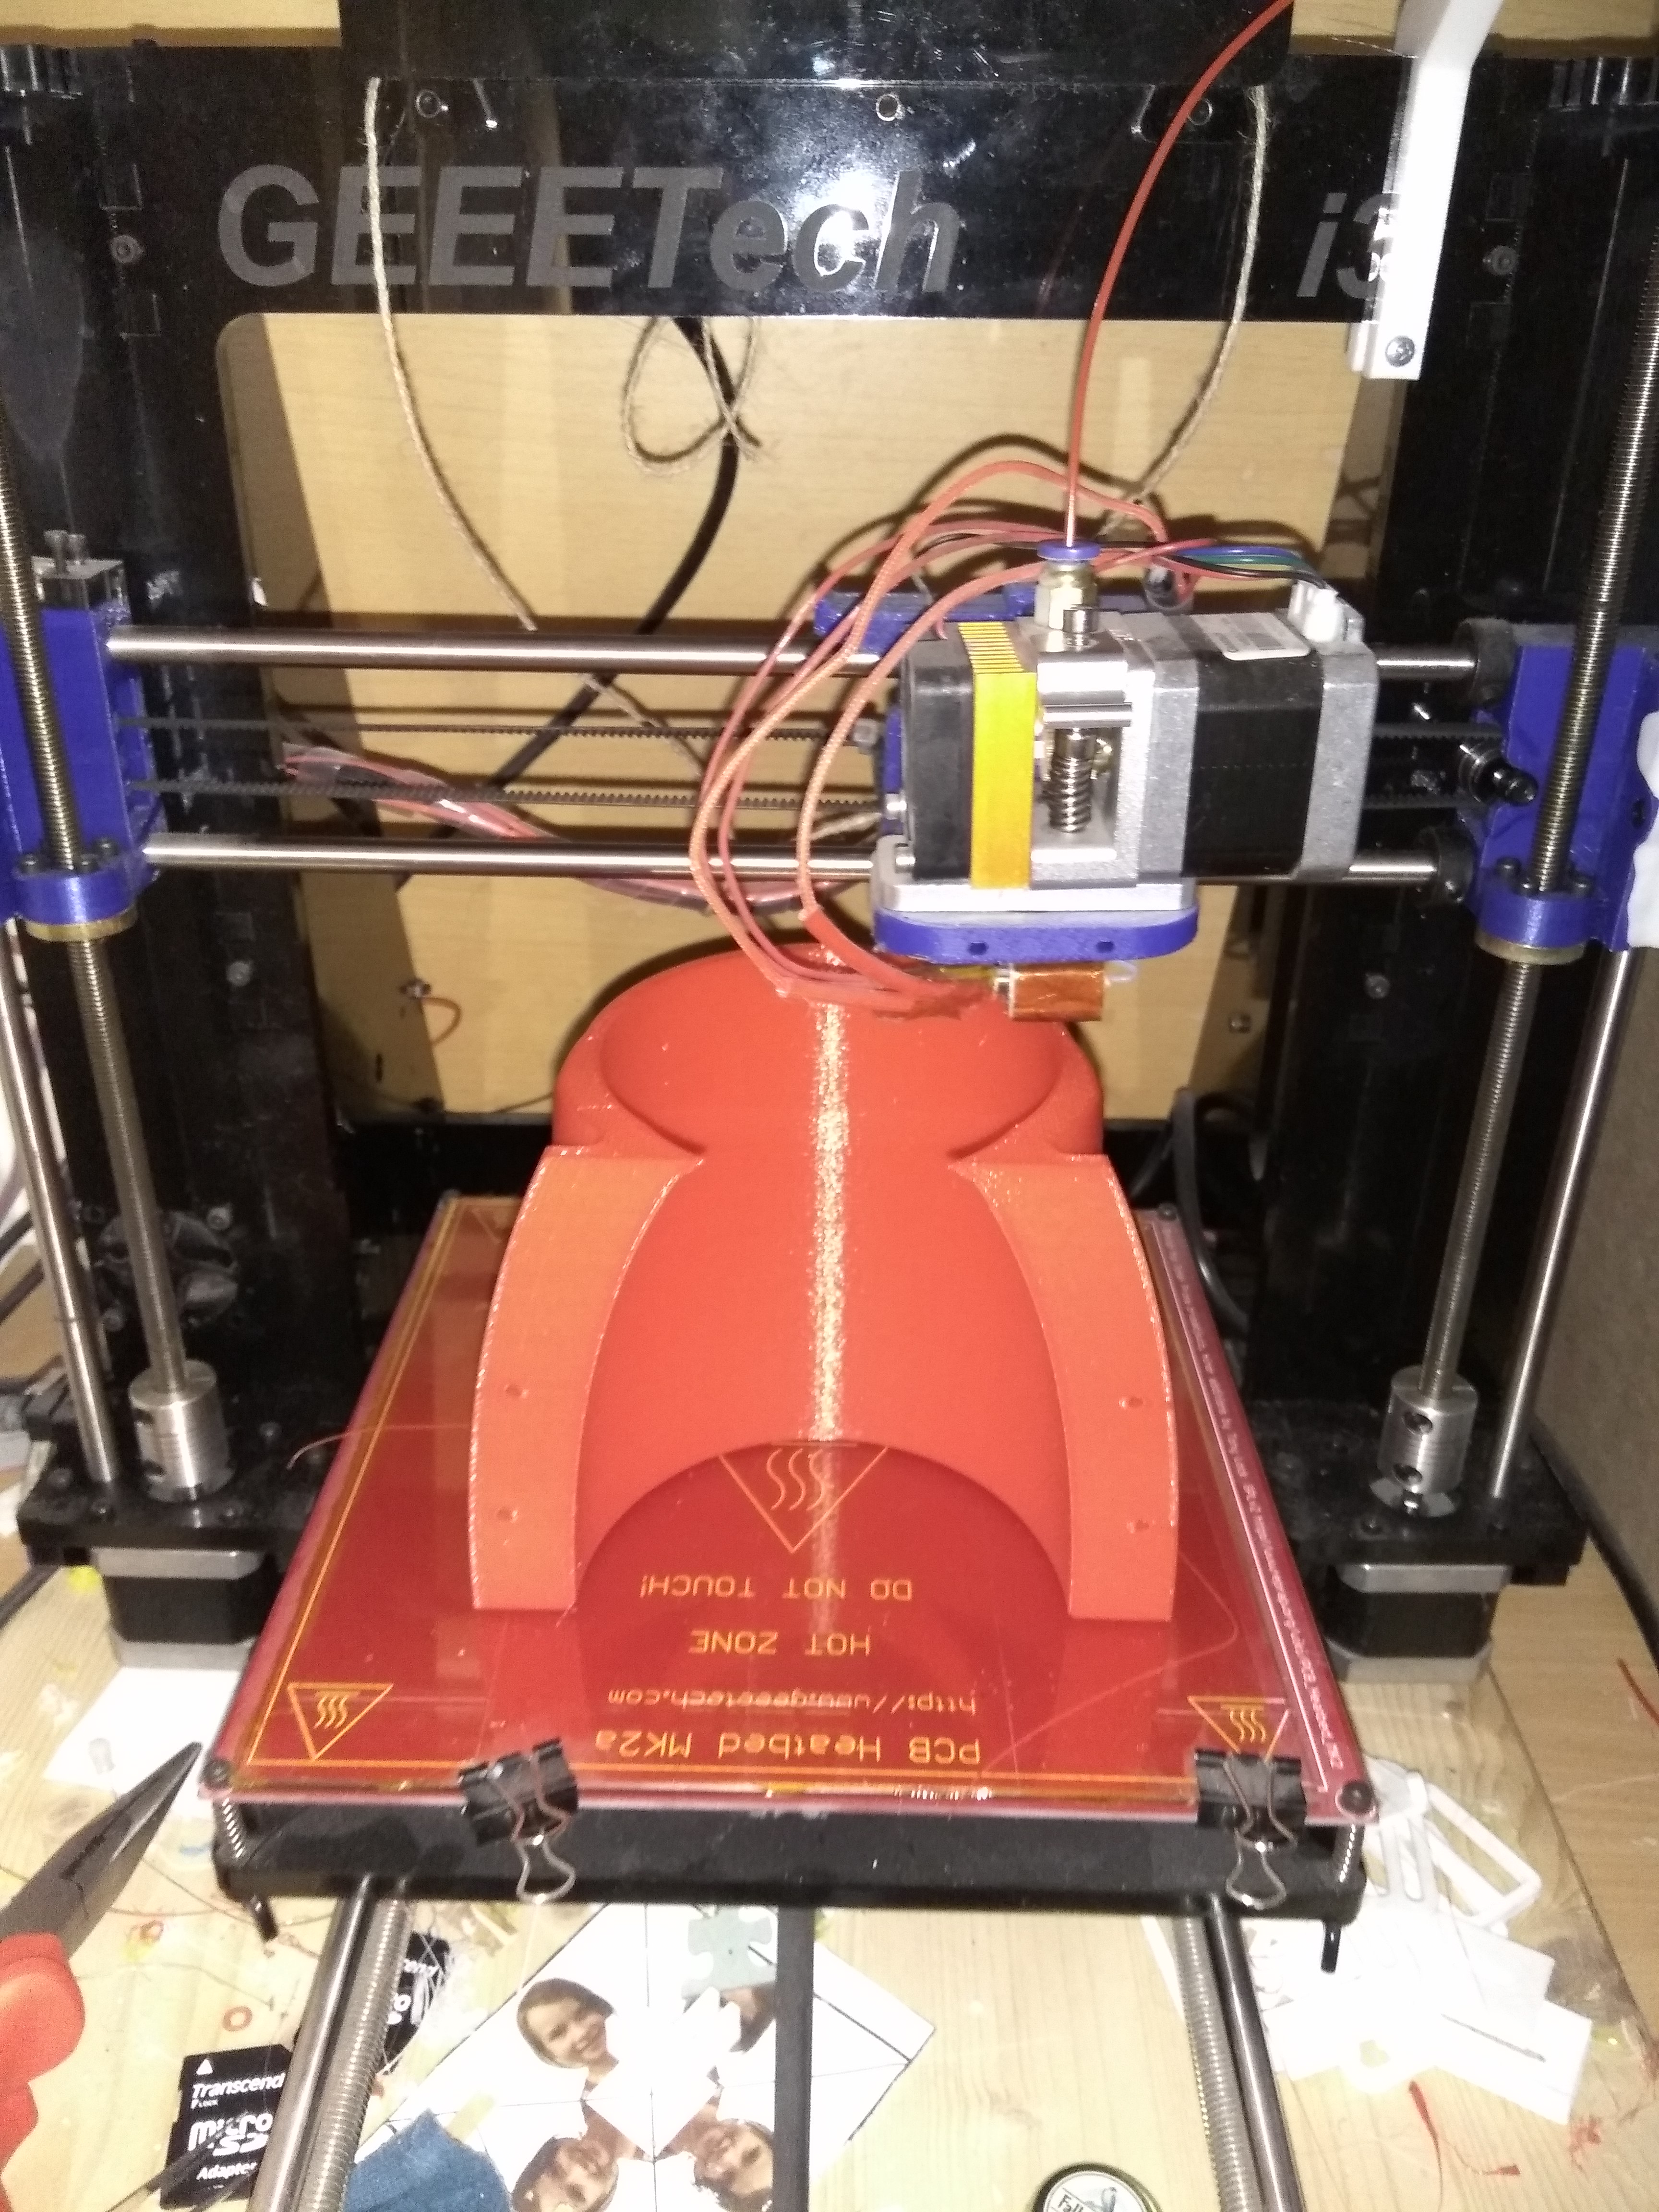 I want to thank the c-base member tecdroid for printing the parts. His 3D-printer is very well calibrated and maintained, which clearly is reflected in the quality of the prints. We chose a red filament that matched the paint on the router fence. We opted for PLA, since it is less susceptible to warp during printing due to temperature differences in the printed object. The larger the object, the stronger the effect of this warping is. ABS would have been more stable, robust and less brittle, but ABS tends to warp more then PLA, so with ABS we would have had a lot more printing fails with objects this size.
Installation
During installation of the parts I learned that the wing nuts to move the boards (to adjust the fence for different tool diameters) collide with the the flange, which is why the boards can not be moved through the full range of motion. Using a jigsaw and a round file solved this problem quickly. Due to the fragility of the materials I used small washers with the wood screws to distribute the force evenly. Also,contrary to my habit, I have not mounted the parts with the powered screwdriver, but gently with a manual screwdriver.
Download
I published the files, so you can print your own if you want. You can find them on Thingiverse, if you follow this Link: http://www.thingiverse.com/thing:1789688