new workbench with further machines
I made a video about this project – directly to the Video
Background
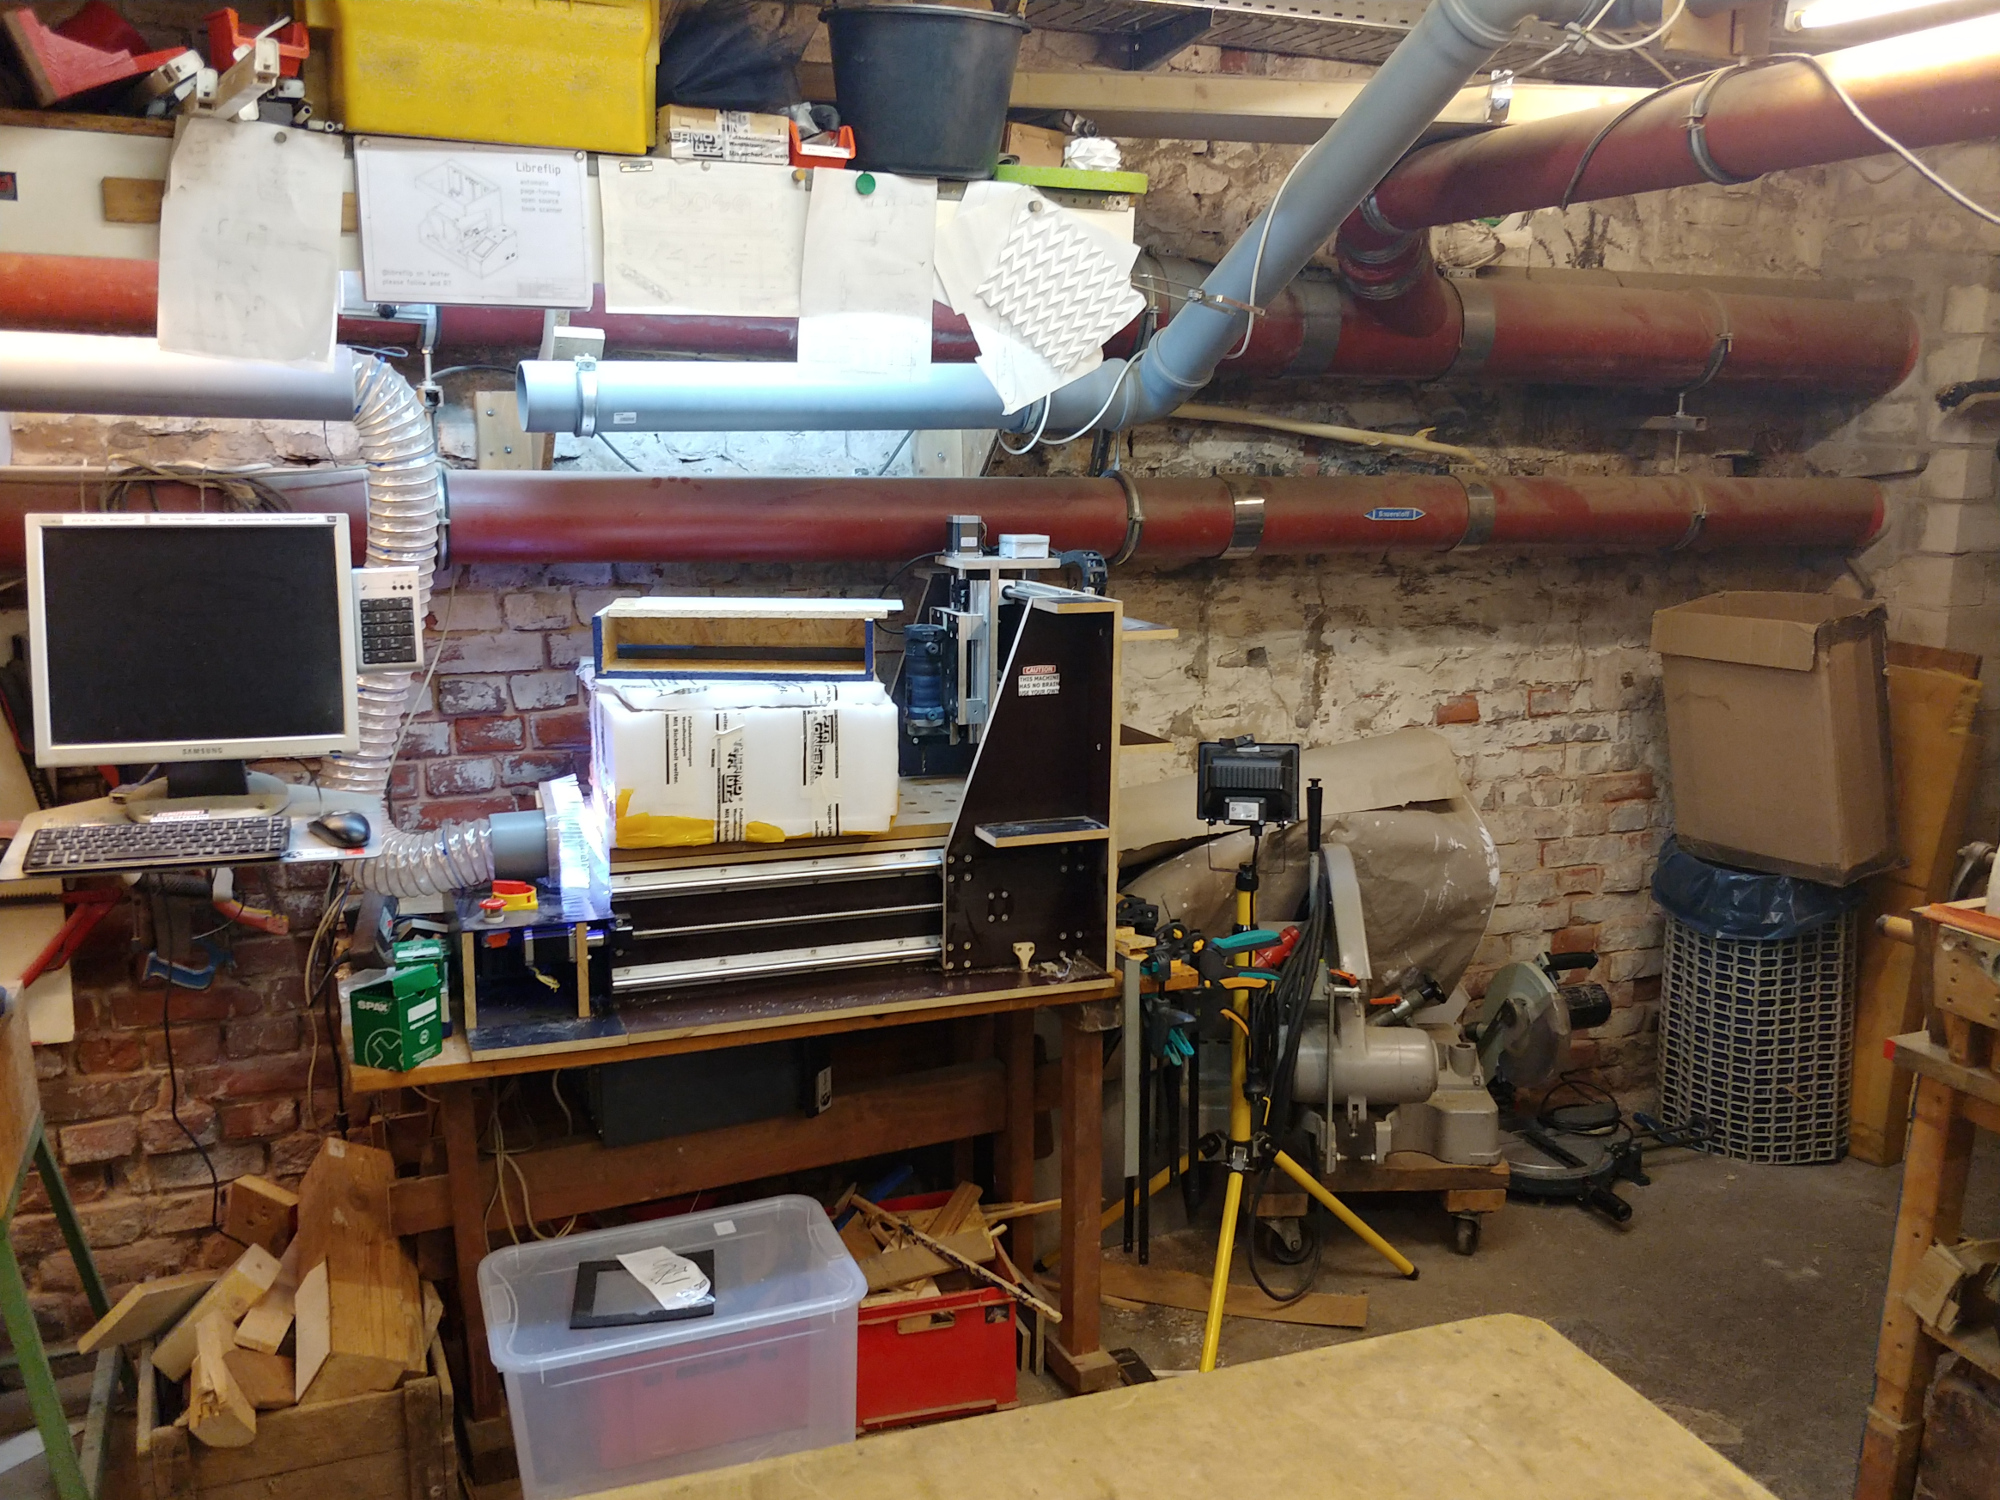
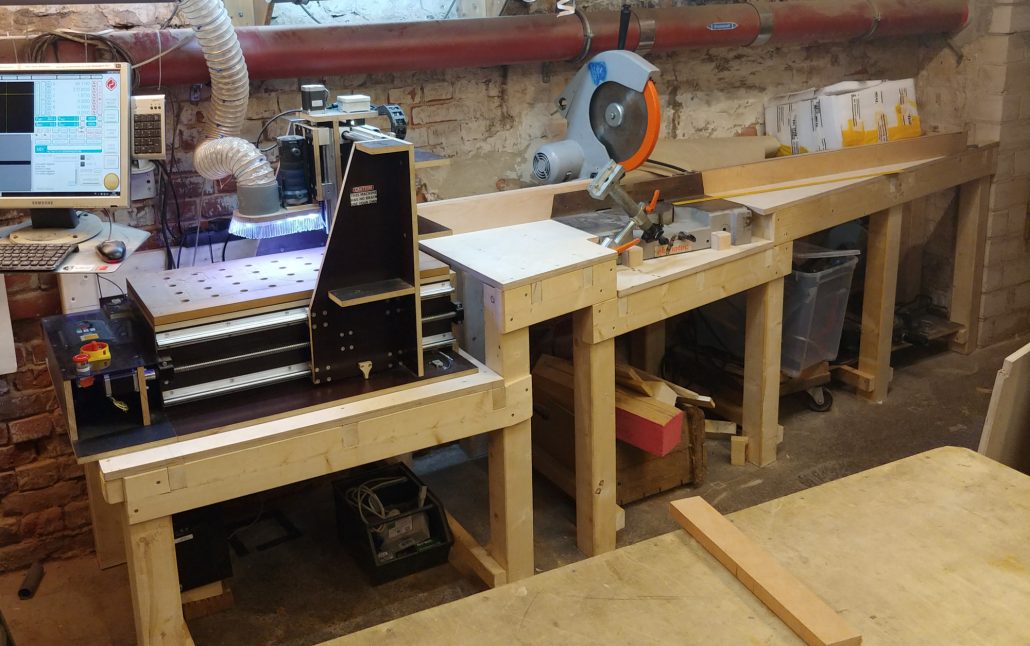
The c-base workshop has a very slanted wall, which used to have shelves for storing material. Since we tend to store less material in the workshop and prefer to have more machines and tools there, we already cleared this wall piece by piece in January and February 2018. The CNC milling machine was already standing at this wall, on an improvised and shaky table. We inherited the chop saw in 2017 and had so far no reasonable place to set it up.
Project
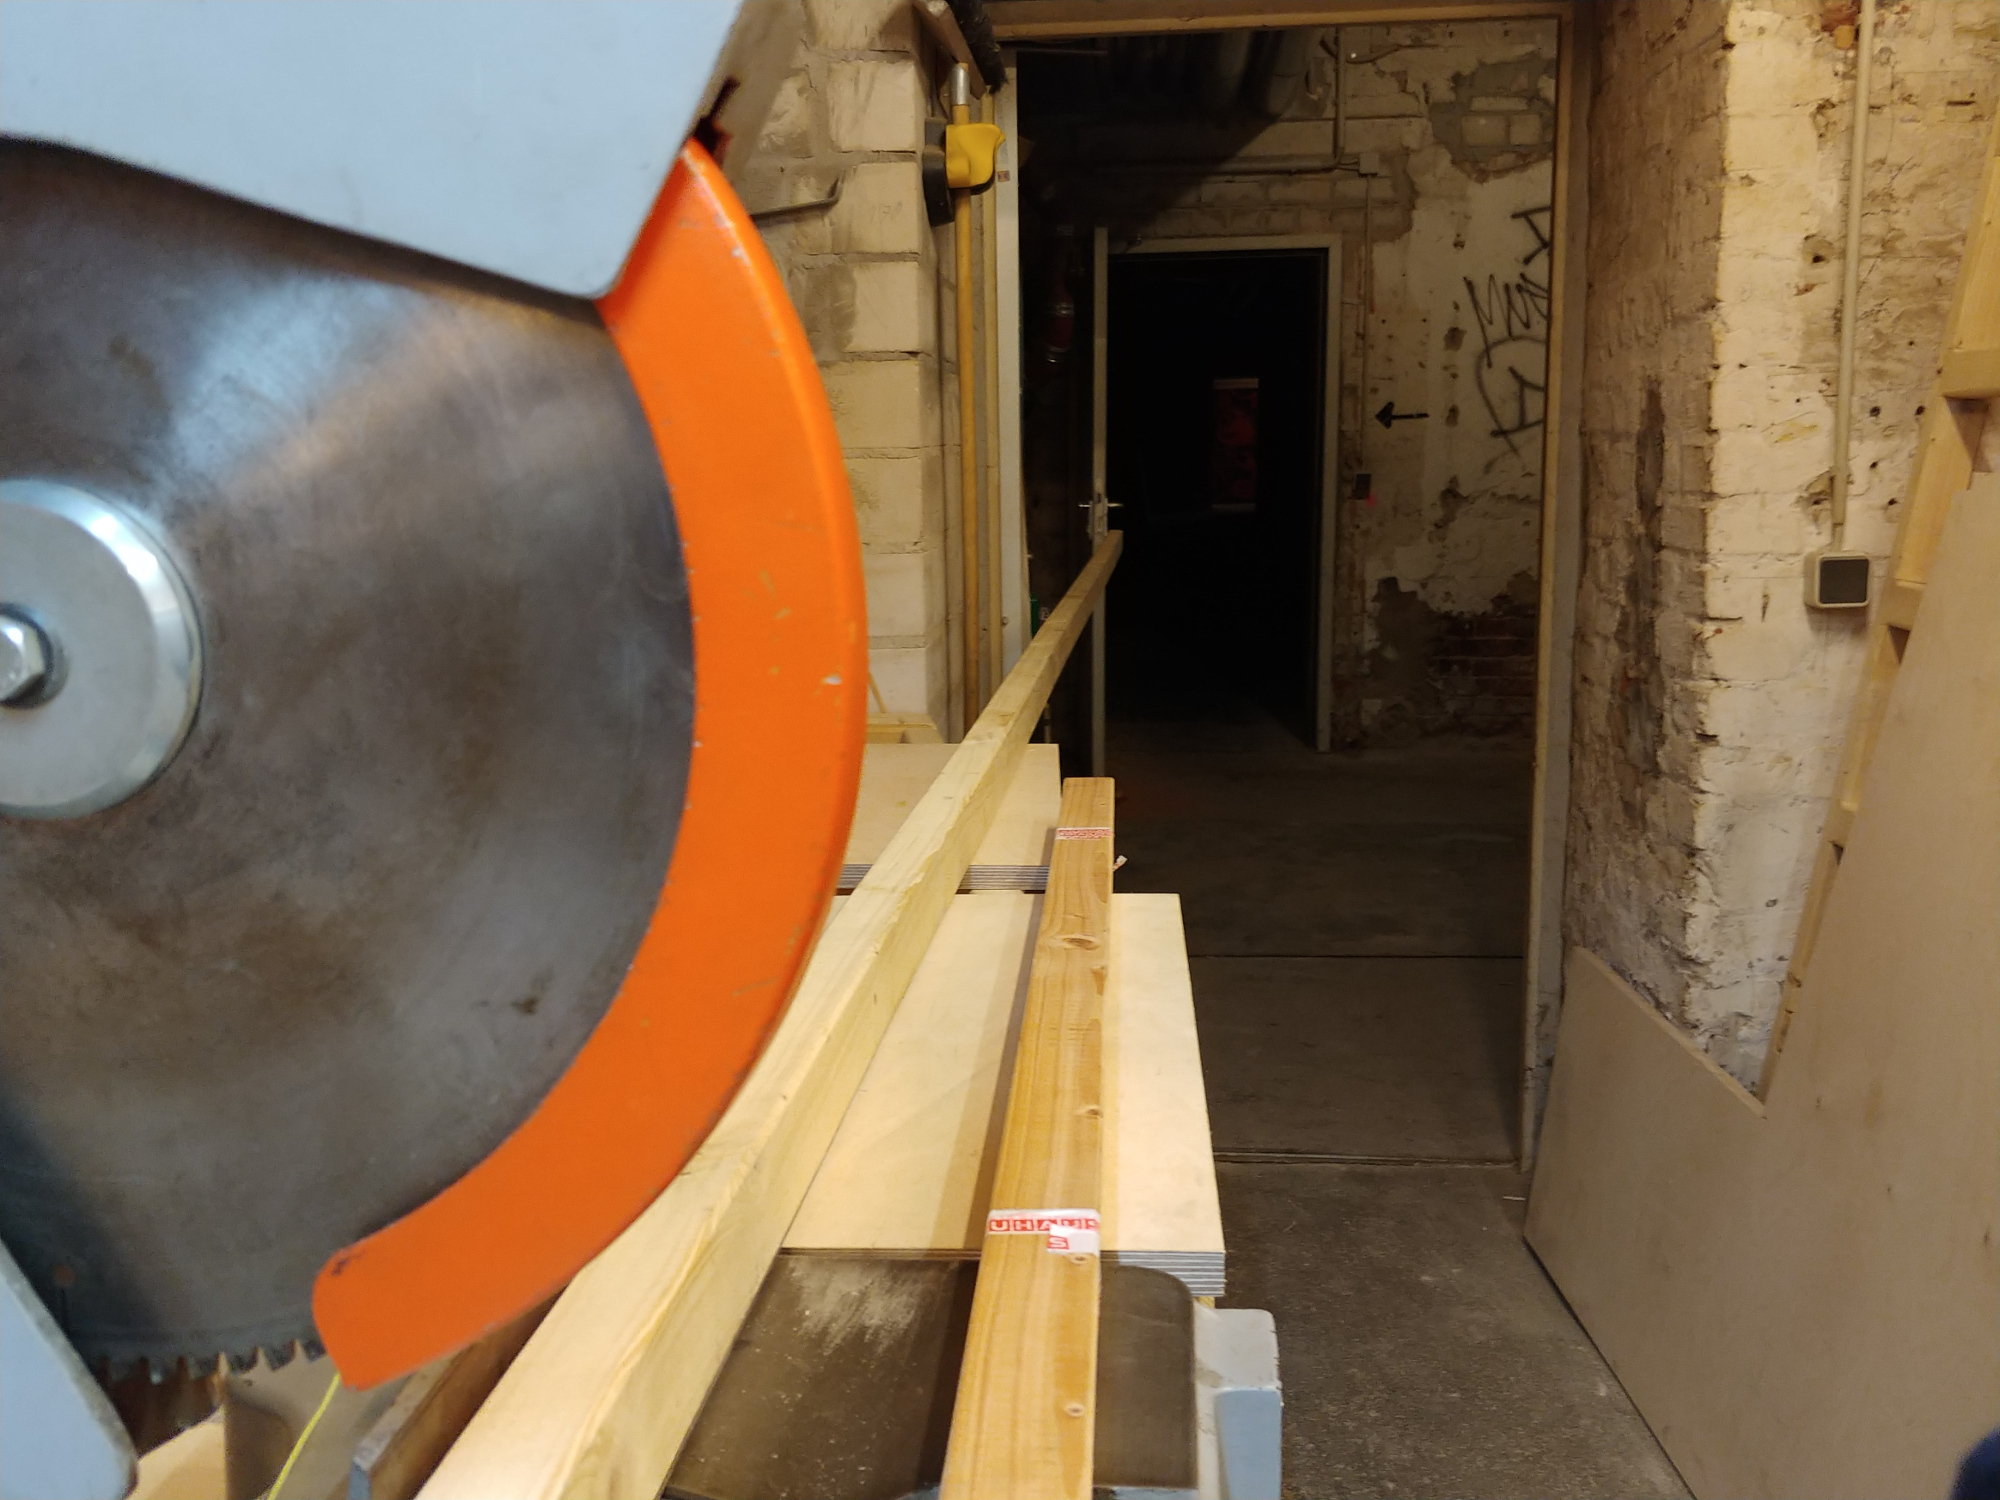
Some functions were particularly important for this project. The fence system should be the same for the CNC milling machine c-nancy, so that we could also comfortably machine the ends of longer workpieces with the CNC milling machine. At the same time, the entire fence system had to be designed so that longer workpieces could protrude through the emergency exit door. Also the important emergency exit could not be blocked. For this reason, the front of the machine received an 11° bend.
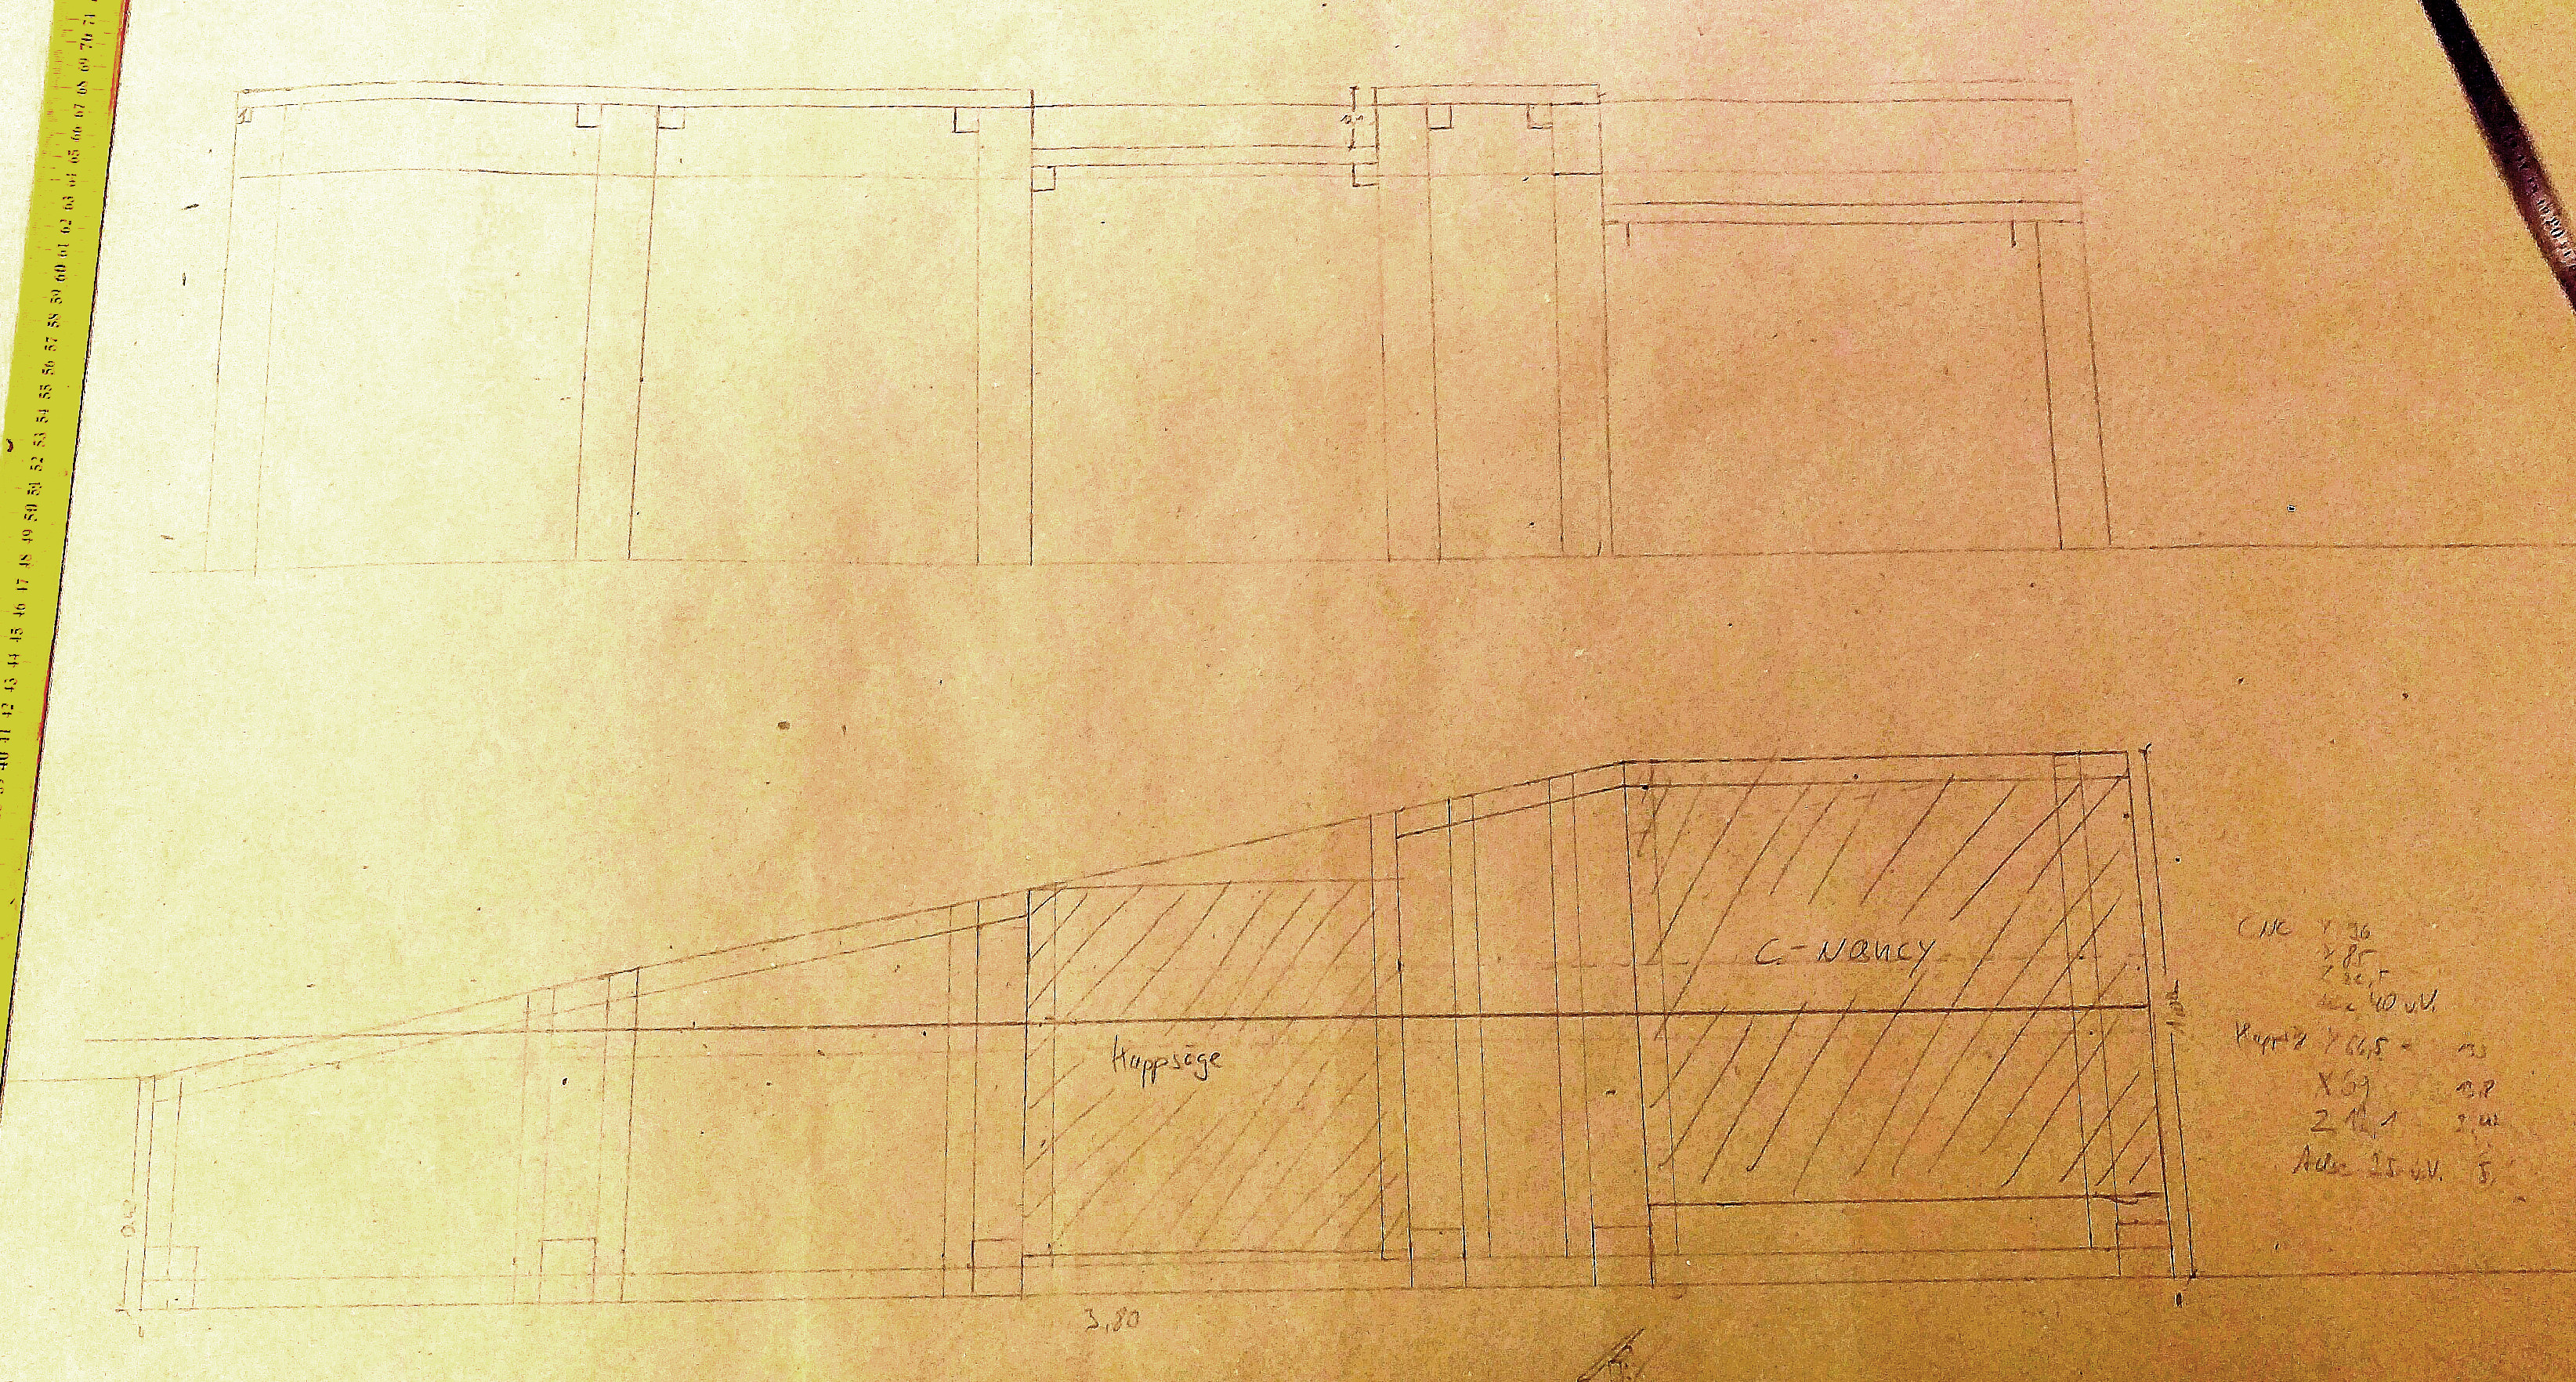 The entire project planning was as an exception carried out completely in analog form and on paper; there were no digital drawings or CAD models. We worked from a true-to-scale drawing on a scale of 1:5, made with a pencil on a large piece of packing paper.
Implementation
Neither the back wall nor the floor offered a straight reference surface, which is why we had to create it first. That’s why we first screwed the rear beam to the wall and made it horizontal with the laser level. Then the rear legs could be adjusted individually – the differences in length were up to 5cm.
All front legs, except the very left one, were planed to an irregular shape, which had the 11° angle mentioned above. The workbench consists of four different zones, from left to right are these: CNC milling machine, middle part, crosscut saw and right part. Then the rabbit joints of the front beam could be cut out from the leg-pieces and the front beam could be mounted. For each of the four zones the legs and the front beam had to be adjusted individually.
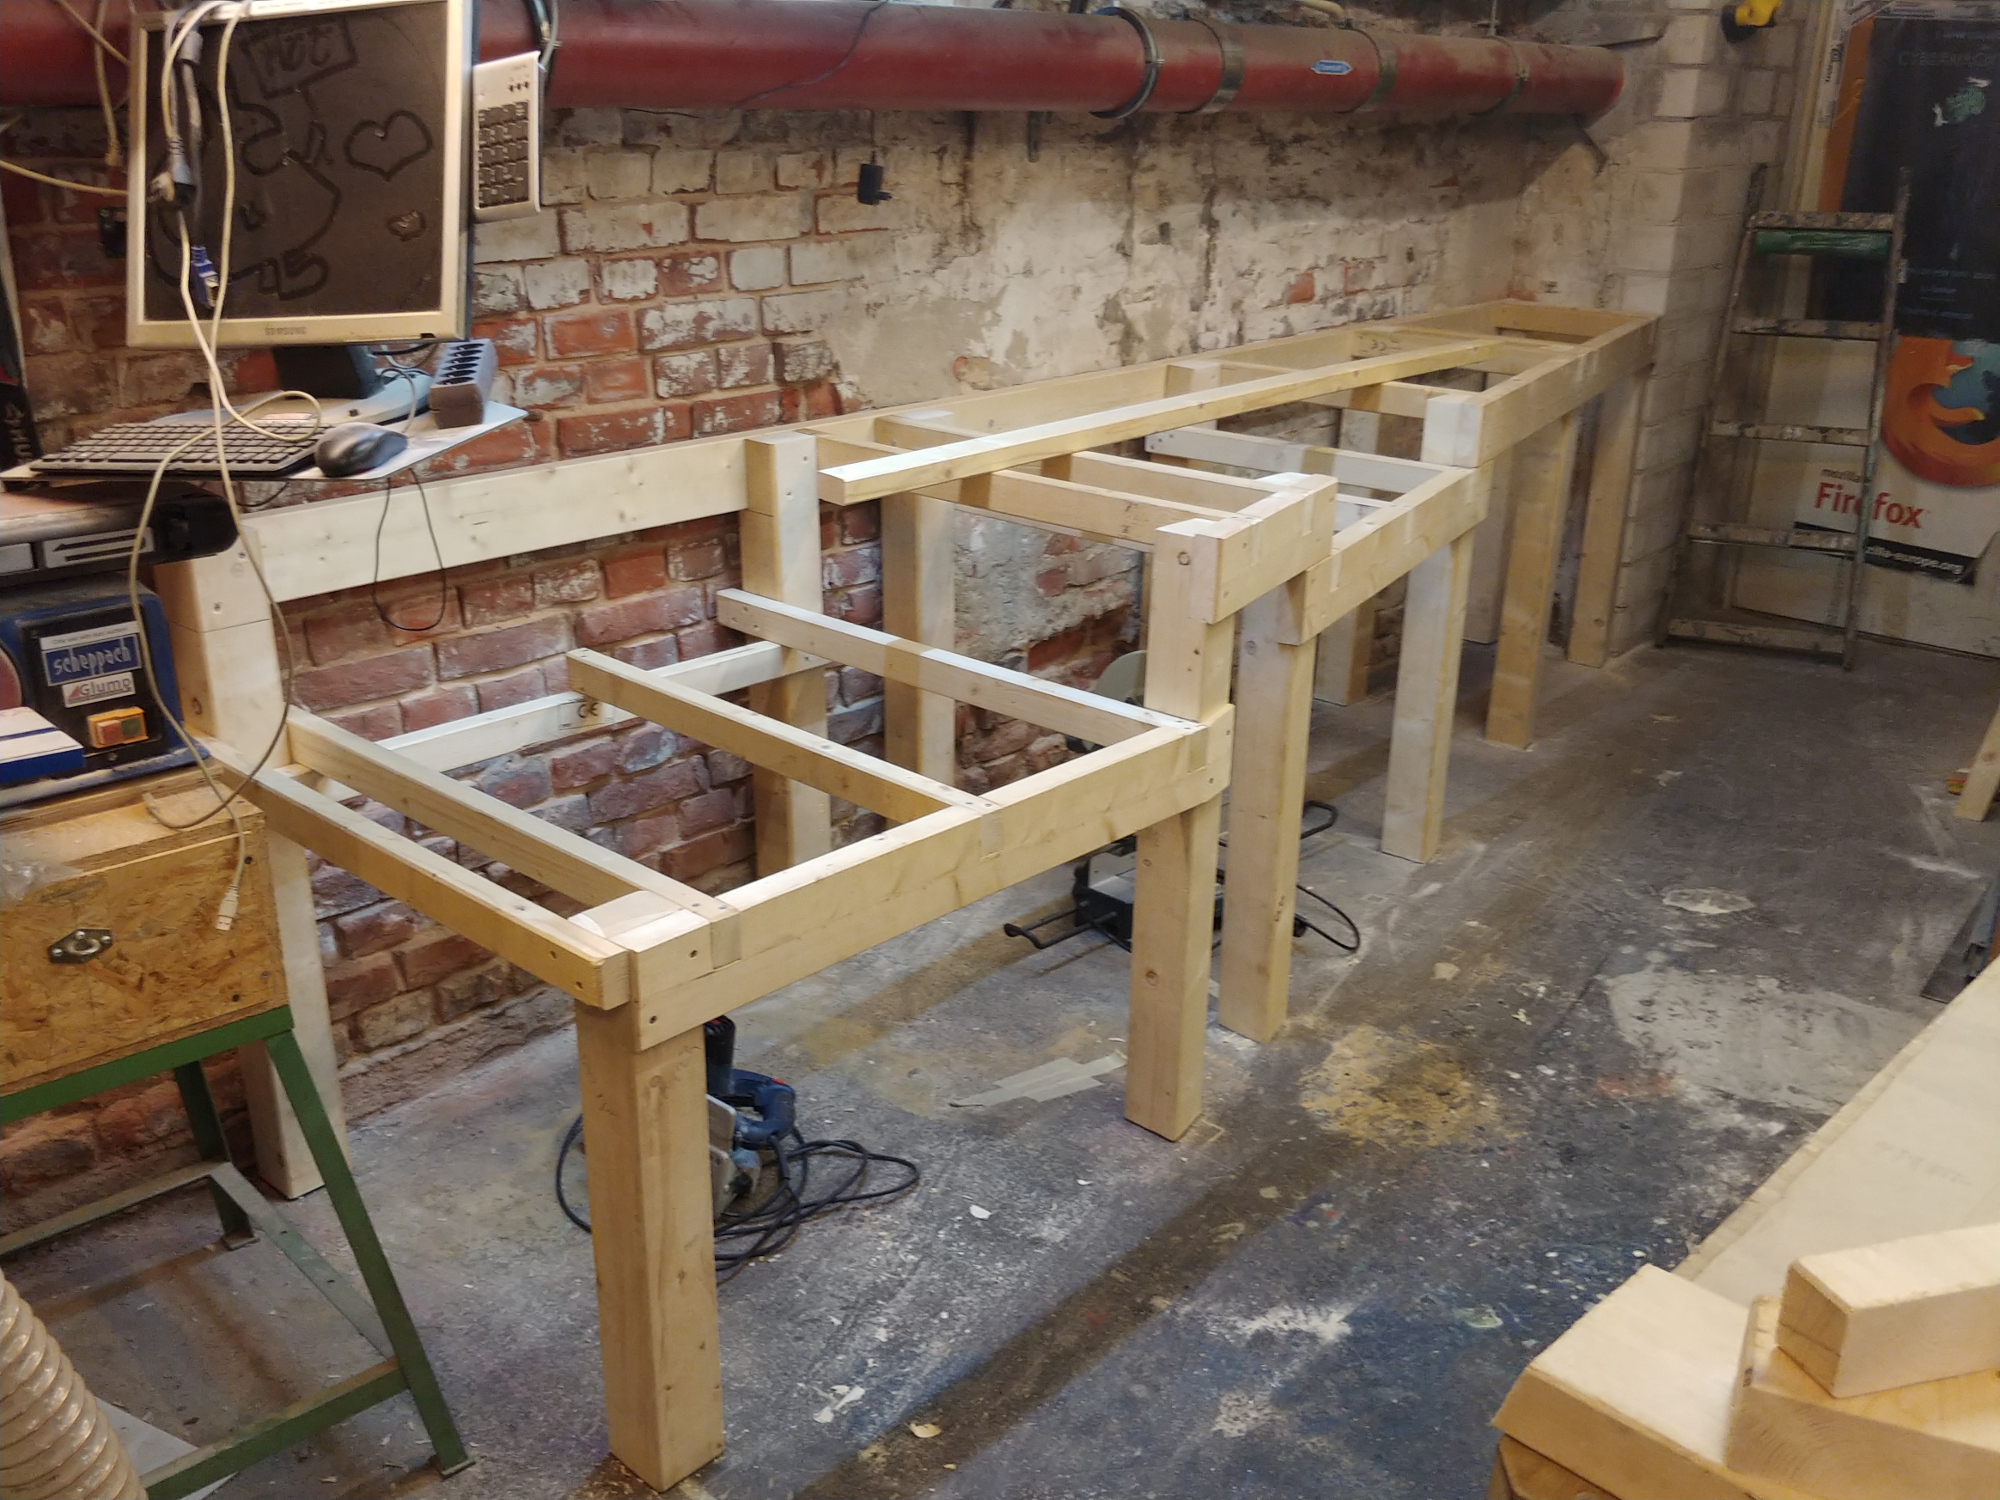
After the basic framework stood, cut-outs were made in the front beams with the hand circular saw, in which the cross braces were mounted under the table top.
The table tops were then fitted individually, starting with the top under the cross-cut saw and then the CNC milling machine. Then the right plate was cut and finally the middle plate between the CNC-milling machine and the cross-cut saw was adapted to the now existing dimensions.
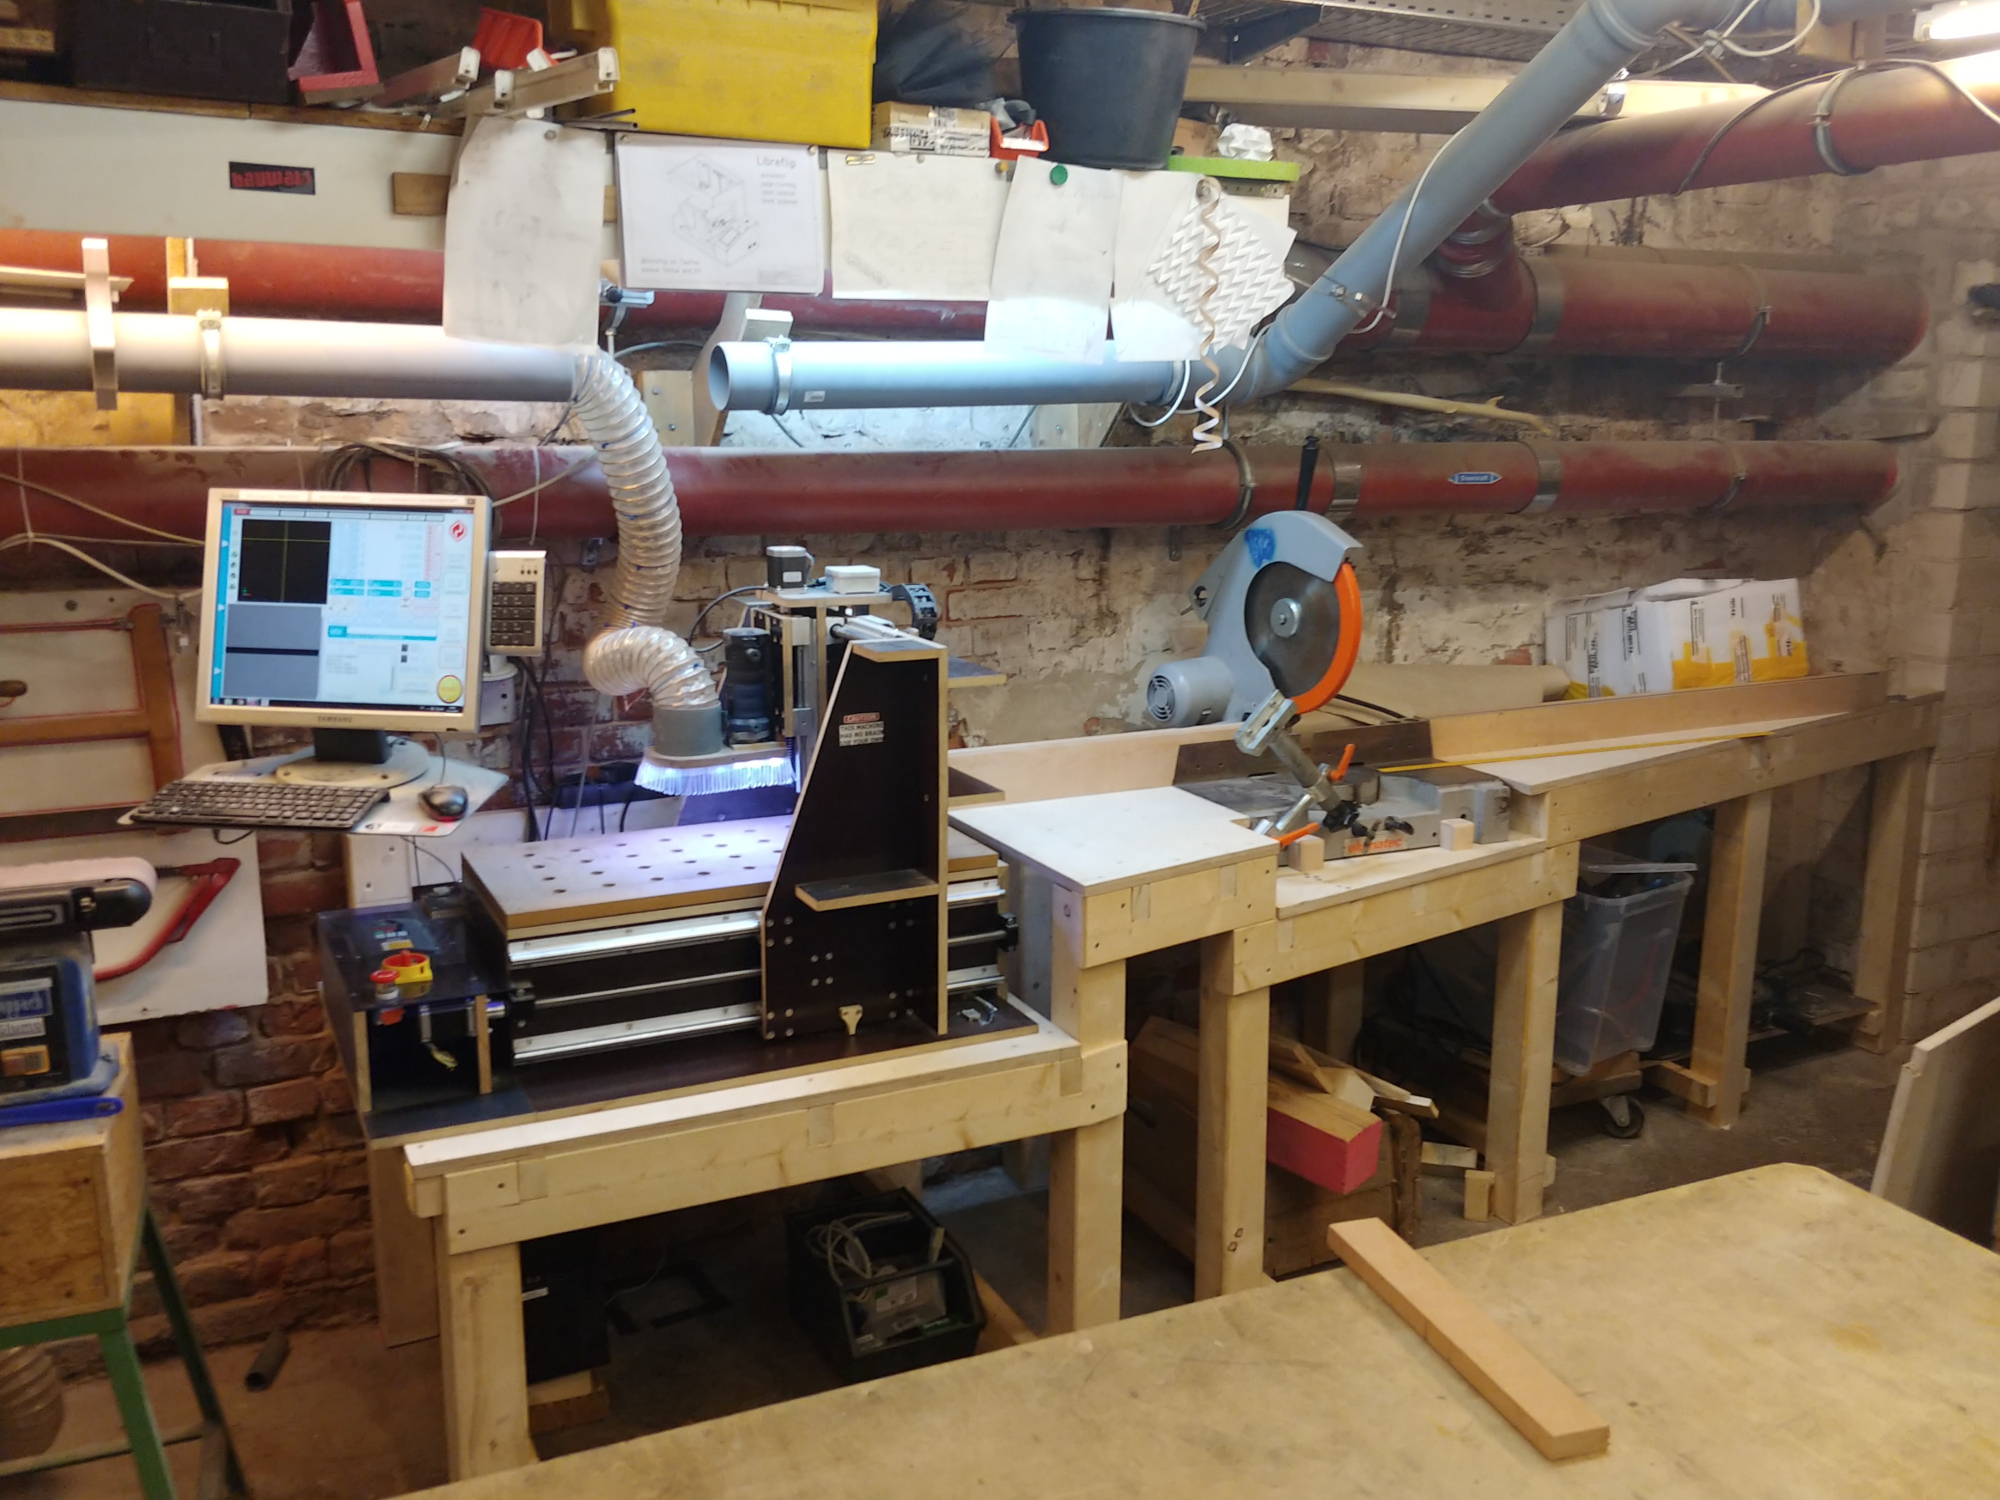
Now we were able to cut red beech from a rough unedged plank with a circular hand saw, a circular table saw and a jointer, to make the beams that became the fences. These beams got a cut-out in which a T-slot rail made of aluminium was mounted. This T-slot rail enables the exact positioning of an end stop so that workpieces of the same length can be cut to length reproducibly with the cross-cut saw.
The T-slot rail is at a different height on the left than on the right, this allows reproducible cutting of very short workpieces on the left side. Therefore some modifications and cut-outs had to be made before the stops could be mounted.
Success
The project is not completely finished yet, there are still some small things missing, such as a protective coating for the surface and the connection of the cross-cut saw to the chip extraction. In addition, we want to create more storage space under the workbench through a shelf and also create some storage space behind the fence. However, this is not absolutely necessary and will happen gradually over the next few months. I will update this blogpost when these little things are done.
The costs for the material were paid by c-base e.V. All work was done on a voluntary basis.
Video
For this project I tried out a new video format – a time-lapse recording, from which I cut out all the boring parts and over which I put an audio narration. The video can be found on my Youtube channel.


")


